Quantcast
Channel: Elcomsoft News – ElcomSoft blog
Viewing all 195 articles
Browse latest View live

iOS 13 (Beta) Forensics

$
0
0

iOS 13 is on the way. While the new mobile OS is still in beta, so far we have not discovered many revolutionary changes in the security department. At the same time, there are quite a few things forensic specialists will need to know about the new iteration of Apple’s mobile operating system. In this article, we’ll be discussing the changes and their meaning for the mobile forensics.

iCloud backups

We’ve seen several changes to iCloud backups that break third-party tools not designed with iOS 13 in mind. Rest assured we’ve updated our tools to support iOS 13 iCloud backups already. We don’t expect the backup format to change once iOS 13 is officially released, yet we keep an eye on them.

First, Apple has changed the protocol and encryption. There’s nothing major, but those changes were more than enough to effectively block all third-party tools without explicit support for iOS 13.

Second, cloud backups (at least in the current beta) now contain pretty much the same set of info as unencrypted local backups. Particularly missing from iCloud backups made with iOS 13 devices are call logs and Safari history. This information is now stored exclusively as “synchronized data”, which makes it even more important for the investigator to extract synced evidence in addition to backups. Interestingly, nothing was changed about synced data; you can still use the same tools and sign in with either Apple ID/password/2FA or authentication tokens.

Other than that, the content of iCloud backups didn’t change much in iOS 13 compared to what we see in iOS 12.3.1 and iOS 12.4 beta. Cloud backups still contain less data than iTunes backups; the difference is about the same as it used to be in iOS 12. To see what is not included into iCloud backups, refer to What does iCloud back up?

According to Apple, this is what you do get in iCloud backups:

Your iPhone, iPad, and iPod touch backup only include information and settings stored on your device. It doesn’t include information already stored in iCloud, like Contacts, Calendars, Bookmarks, Mail, Notes, Voice Memos, shared photos, iCloud Photos, Health data, call history, and files you store in iCloud Drive.

There are certain changes in iCloud backups produced by iOS 13 devices. iCloud backups produced by iOS 13 will not include any of the following:

  • Keychain *
  • Health data
  • Home data
  • iCloud Photos **
  • Messages **
  • New in iOS 13: Call logs
  • New in iOS 13: Safari history

* In fact, the keychain is still there, but it is encrypted using a device-specific key.

** Photos and Messages are not included if (and only if) the iCloud syncing of those categories is not enabled in device settings.

There are some changes to local backups as well. Proceed to the local backups section to learn more.

Elcomsoft Phone Breaker is now able to download iOS 13 (and iPadOS) backups too – the first and only solution in the industry!

Authentication tokens

Normally, you would need proper credentials to access iCloud data, including the login, password, and second authentication factor. The other way is to use authentication tokens. Start reading with iCloud security overview:

When you access iCloud services with Apple’s built-in apps (for example, Mail, Contacts, and Calendar apps on iOS or macOS), authentication is handled using a secure token. Secure tokens eliminate the need to store your iCloud password on devices and computers.

We were the first who learned how to use the tokens to access iCloud, read our old article Breaking Into iCloud: No Password Required; I’d also recommend to read iCloud Authentication Tokens Inside Out.

iOS 13 further restricts our ability to use authentication tokens. Today, you cannot use tokens to access any of the following:

  • iCloud backups
  • iCloud keychain
  • Messages in iCloud
  • Health data

Moreover, Apple did its best to limit the tokens even more: since iCloud for Windows (released about a year ago) and macOS update available from about the same time, the tokens became “pinned” to a particular device, and can only be used to access the iCloud from the very same device.

We were able to discover a resolution, but only for macOS computers. Sorry, no Windows and no iOS device keychain. We can extract fully-featured iCloud authentication tokens from macOS computers and use those tokens on any other computer. The token can be used to authenticate into iCloud without using the login, password and two-factor authentication process. Still, a token cannot be used for accessing backups, iCloud Keychain, Messages and Health.

Synchronized data

Apple iCloud keeps more data than you can probably imagine. Have you read Apple’s Privacy – Government Informatriomn Requests? You definitely should; you will understand what data is stored in a typical iCloud account.

At this time (iOS 13 Beta 3) we have not detected any changes to iCloud synchronized data. (As a reminder, iOS 12 introduced a major change there, encrypting Health data with device passcode or system password, gradually deprecating legacy unencrypted containers). Here is what Elcomsoft Phone Breaker can extract and decrypt:

  • iCloud backups
  • Files from iCloud Drive
  • iCloud Photos
  • iCloud Keychain
  • Health and Messages
  • FileVault2 recovery token
  • Synced iCloud data including Safari history and call logs (which are no longer included in iCloud backups)

Local backups: iTunes or no iTunes

Apple announced a major overhaul to iTunes, the only ‘official’ app to make local backups of iOS devices. While we still have not seen an ‘overhauled’ version of iTunes for Windows, Mac users are already affected. In future versions of macOS (including the current beta version of macOS Catalina), local backups will be created in the Finder app instead of iTunes. Yes, there will be no iTunes on the Mac.

There are also quite a few changes to the content of local backups.

  1. When you set or change a password protecting a local backup, you will now require a passcode. Similar to new pairing requests (since iOS 11), you’ll need to enter the passcode on the device itself. We are still evaluating how this change will affect iOS Forensic Toolkit.
  2. In iOS 12, iCloud backups already contained less information than unencrypted local backups. In iOS 13, iCloud backups contain even less information compared to local backups, even those that aren’t encrypted with a password. Compared to iOS 12, iOS 13 is missing Call logs, Safari browsing history and Tabs open in Safari. These are still included in encrypted local backups but missing from iCloud backups and unencrypted iTunes backups.

Elcomsoft mobile forensic tools and iOS 13

With the exception of iOS Forensic Toolkit, we’ve made our mobile forensic tools ready for the upcoming OS. Elcomsoft Phone Breaker has recently received an update with support for the beta versions of iOS 13. The tool can download iCloud backups created with Apple devices running a beta version of iOS 13; both public and developer betas of iOS 13 are supported including the new iPadOS. In addition, EPB is now able to extract fully-featured iCloud authentication tokens from macOS computers. Elcomsoft Phone Viewer received a similar update to support local (iTunes) and iCloud backups produced by iOS 13 devices.

If you are using a Mac, you’ll be pleased to know that both tools (Phone Viewer and Phone Breaker) support macOS 10.15 Catalina now. To tell the truth, the support is not perfectly complete yet, but neither is macOS Catalina. We’ve got all the major functions running, and we don’t see any major bugs or crashes. Still, if you’ll be using our software on macOS Catalina, do let us know if you encounter any problems on 10.15 beta.


Accessing iCloud With and Without a Password in 2019

$
0
0

In iOS forensics, cloud extraction is a viable alternative when physical acquisition is not possible. The upcoming release of iOS 13 brings additional security measures that will undoubtedly make physical access even more difficult. While the ability to download iCloud backups has been around for years, the need to supply the user’s login and password followed by two-factor authentication was always a roadblock.

Some five years ago, we learned how to use authentication tokens to access iCloud backups without a password. In Breaking Into iCloud: No Password Required we discussed the benefits of this approach. During the next years, we learned how to use authentication tokens to access other types of data stored in iCloud including the user’s photo library, browsing history, contacts, calendars and other information that Apple synchronizes across all of the user’s devices that are signed in to the same Apple account.

Many things have changed since then. Tokens can no longer be used to access iCloud backups, period. Tokens cannot be used to access passwords (iCloud Keychain), Screen Time, Health and Messages. Sometime last year Apple pinned authentication tokens to a particular computer, making them usable just from the very PC or Mac they’ve been created on. It took us more than a year to figure out a workaround allowing experts to transfer authentication tokens from the user’s computer. Even today, this workaround is only working if the user had a macOS computer. With this number of restrictions, are authentication tokens still usable? What can you obtain from the user’s iCloud account with an authentication token, and what can be accessed with a login and password? How two-factor authentication affects what’s available in an iCloud account, and why knowing the screen lock passcode (or Mac system password) can help? Keep reading to find out.

iCloud Security

Apple does not own the servers (or, rather, services) that store their users’ data. iCloud backups, photos, messages, and even passwords are kept on third-party servers owned by Amazon, Microsoft, Google, AT&T and the Chinese government (for users residing in continental China). This, however, does not mean that Amazon, Google or the Chinese government has access to any of that data. Let’s have a look at how Apple secures iCloud data against physical threats, taking an iCloud backup as an example.

The user’s iCloud backup is broken into chunks, with each individual chunk being uploaded (in seemingly random order) to one or more servers. Each chunk is encrypted with a unique, individual encryption key. Without those keys, the chunks, even if assembled in the right order, will remain being blocks of encrypted binary data.

What about the encryption keys? The keys are always stored on Apple’s own servers in a data center in Cupertino. They are never passed to Apple’s partners, contractors or the Chinese government (unless serving a legal request).

A few things become immediately obvious when considering this protection scheme.

  1. Apple has full access to encrypted information as the company has both the data and the encryption keys.
  2. Apple can decrypt the data and pass it along to the law enforcement.
  3. Someone with proper authentication credentials can access both the data and the encryption keys, thus retrieving and decrypting the backup.

iCloud Backups Security

Speaking of iCloud backups, it is important to understand that while most parts of the backup can be decrypted with proper credentials, certain content of iCloud backups will be additionally encrypted with highly secure, hardware-based encryption keys. The encryption happens inside an iOS device (on the iPhone or iPad itself); none of that data leaves the device unencrypted in any form. As a result, such content can be only restored onto exactly the same hardware device it was backed up from. In iOS 12 and iOS 13 (beta), this content includes:

  • The keychain. User’s Safari and third-party app passwords remain securely protected within an iCloud backup (remember, we are speaking about the keychain stores in iCloud backups only; more on cloud keychain protection and extraction later). The keychain can be only decrypted on the device that produced the backup. Neither Apple nor law enforcement can access this part of iCloud backups without having the original device.

The following items are never included in iCloud backups:

  • Health data
  • Home data

In addition, some items are specifically excluded from iCloud backups if the user enables iCloud sync for that data category. These items include:

  • iCloud Photos
  • Messages (SMS and iMessages)

iOS 13 additionally excludes the following two data categories (new!):

  • Call logs
  • Safari history

iCloud Backups and Tokens

In our 2014 article Breaking Into iCloud: No Password Required we discussed the use of authentication tokens to access iCloud backups. This is no longer possible (for a long time).

iCloud authentication tokens cannot be used to access iCloud backups. Period.

Synchronized Data

Since the appearance of iCloud backups back in 2011, Apple is slowly moving things away from backups. The introduction of iCloud Photo Library made photos sync across devices via a dedicated service in iCloud. Once the user enabled their cloud photo library, the pictures would no longer save into iCloud backups. Similarly, once the user enabled iCloud Messages (requires iOS 11.4 and newer), the messages would no longer save in iCloud backups, but rather sync via the user’s iCloud account. iOC 13 will stop including Call Logs and Safari history in iCloud backups; these two categories will be available exclusively as synchronized data.

Authentication tokens are good for extracting synced data (except protected categories). The following summarizes the protection of synchronized information in iCloud:

  • To access synced iCloud data, one only needs the user’s Apple ID, password and 2FA code.
  • You can also use authentication tokens to access synced data.
  • Apple has technical ability to access synced data in iCloud.
  • Synced data is provided when serving government requests.
  • Synced data is provided when serving GDPR requests.
  • Finally, third-party apps such as Elcomsoft Phone Breaker can extract synced iCloud data.

Some iCloud Data is Encrypted with a Passcode

Certain data categories receive a different treatment.

The following data types can be only decrypted if you know the screen lock passcode (or Mac system password) of a device registered with the same Apple ID:

  1. iCloud Keychain. The keychain contains the user’s synced logins and passwords from Safari browser and third-party apps and some authentication tokens. Most importantly, the iCloud Keychain also stores the encryption keys protecting the other encrypted data types (you cannot decrypt e.g. Messages without first decrypting the iCloud Keychain).
  2. Messages in iCloud. This includes SMS and iMessages.
  3. Since iOS 12, Health data. The protection of synced Health data has changed in iOS 12 compared to iOS 11; more on that in the next chapter.

In order to access these protected data categories, you will need all of the following:

  • The user’s Apple ID and password
  • One-time 2FA code (there will be no iCloud sync for any of those categories without 2FA)
  • Passcode or system password to a device already enrolled in iCloud Keychain

Consecutively, the following access restrictions apply:

  • Authentication tokens cannot be used to access any of these types of data.
  • A typical user will have no problems syncing the Keychain, Health or Messages with iCloud. When initializing a new iPhone to receive synced data, they just need to provide their screen lock password code to their old iPhone (or any device that has iCloud Keychain enabled including Mac computers).
  • Apple does not have access to synced passwords, messages or Health data. Even if the data is stored on Apple servers, Apple cannot decrypt it.
  • Apple will not provide any data belonging to protected categories when serving government requests or GDPR requests (with one exception).
  • Extraction with third-party apps is restricted yet still possible if one knows the device passcode/system password (Elcomsoft Phone Breaker).

Exception: Protection and Extraction of Health Data in iOS 11 and iOS 12

Starting with iOS 11, Apple implemented health data sync with iCloud. In iOS 11, all types of data except CDA records would sync with iCloud in exactly the same manner as other types of synchronized data such as pictures or contacts. There were no additional protection for activities, sleep, nutrition, mindfulness and similar types of data.

Protection of Health data in iCloud: iOS 11

  1. To access synced Health data, one only needs the user’s Apple ID, password and 2FA code.
  2. Apple has technical ability to access Health data in iCloud.
  3. Health data is provided when serving government requests.
  4. Health data is provided when serving GDPR requests.
  5. Finally, third-party apps such as Elcomsoft Phone Breakercan extract Health data.

Protection of Health data in iCloud: iOS 12 and 13

iOS 12 implements a different approach to protecting Health data in iCloud, employing secure encryption with a key stored in iCloud Keychain. The actual data is now stored in a different (encrypted) container compared to iOS 11. Interestingly, the old (unencrypted) container could remain available for some time after the user updated their last device to iOS 12.

The encryption key is protected with the user’s passcode (screen lock password or system password) of a device already participating in Health sync. This ensures that Apple cannot access Health data (or the iCloud Keychain if that matters) stored in the cloud. We consider this protection mechanism to deliver sufficient security.

In order to access Health data synced with iCloud by devices running iOS 12 and newer, one needs all of the following information:

  • The user’s Apple ID and password
  • One-time 2FA code (there will be no iCloud sync without 2FA)
  • Passcode or system password to a device already enrolled in Health iCloud sync

Consecutively, the following access restrictions apply:

  • When initializing a new iPhone, the user needs to provide their screen lock password code from old iPhone (or any device that has iCloud Keychain enabled including Mac computers) to receive synced Health data.
  • Apple does not have access to synced Health data. Even if the data is stored on Apple servers, Apple cannot decrypt it.
  • Apple will not provide Health data when serving government requests or GDPR requests.
  • Extraction with third-party apps is restricted yet still possible (Elcomsoft Phone Breaker).

Two-Factor Authentication: Advantages

In Apple’s land, two-factor authentication affects… everything. If the user enables two-factor authentication on their account, they gain a range of abilities that aren’t available for accounts without 2FA. They can instantly reset their Apple ID password from their iPhone using just the passcode. They can disable Find My iPhone without knowing the iCloud password. Forensic experts find a few other features useful when it comes to two-factor authentication. Only accounts with two-factor authentication can do the following:

  • Sync passwords through iCloud (iCloud Keychain)
  • Sync Messages (SMS and iMessages)
  • Sync Health data
  • Sync Screen Time data (including Screen Time data of dependents’ accounts)

In a way, two-factor authentication is a blessing for the law enforcement because accounts with 2FA sync more information through iCloud compared to unprotected account. Passing the 2FA prompt can be as simple as obtaining the user’s SIM card and using it in another device to receive a text message with the one-time code.

Alternatively, one can use authentication tokens to skip the 2FA prompt altogether. And here’s where we come to restrictions.

Tokens and Two-Factor Authentication: Restrictions

When we initially researched iCloud authentication tokens, we had no problem using them for obtaining pretty much everything from the cloud including backups. Today, Apple limits the use of authentication tokens. You can no longer use authentication tokens to access iCloud backups for accounts that use two-factor authentication. While you can still use a token to download iCloud backups from non-2FA accounts, the lifespan of these tokens is limited to just one hour since the token was created.

Regardless of two-factor authentication status, you can still use authentication tokens (without obvious time restrictions) to access the following categories of synced data:

  • Many categories of synced data including Contacts, Calendars, and Notes
  • Safari browsing history and open tabs
  • Wallet cards
  • Call logs
  • iCloud Photos
  • Files from iCloud Drive including many third-party app containers (1Password, WhatsApp, Viber etc.)
  • Recovery token for FileVailt2-encrypted drives
  • Cloud mail

Two-factor authentication is enabled:

  • iCloud backups cannot be accessed with a token

Two-factor authentication is NOT enabled:

  • iCloud backups can be accessed with a token, but only within 1 hour since the token was created

The following categories are INACCESSIBLE with authentication tokens:

  • Passwords (iCloud Keychain)
  • Health
  • Screen Time
  • Messages (SMS and iMessage), if Messages in iCloud are enabled *

* If Messages in iCloud are not enabled, the messages are stored in iCloud backups.

Windows vs. macOS

A much less obvious restriction of authentication tokens lies in the computer you extract it from. While Apple serves both Windows and Mac users with respective versions of iCloud software, the authentication tokens created on these platforms are different.

On Windows computers, the token is buried deep in the file system. It’s also encrypted with user credentials, so you must be able to sign in to the user’s account (or at least know their login and password) to decrypt the token. Elcomsoft Phone Breaker can do it automatically; just launch the tool, push a few buttons, and the token will saved into a text (XML) file, ready to use with EPB.

Is it that simple? Yes and no. While you can extract the token from a Windows computer, decrypt it and use with Elcomsoft Phone Breaker to access select data categories in iCloud (refer to the “Restrictions” section for details), you can do all of that only on the very same computer the token was created on. You can’t even use it from a virtual machine created of the user’s disk image; it must be the physical computer the token was created on. We refer to these tokens as limited.

If the user has a Mac, you might be able to extract a full, unrestricted token in addition to the limited one. Within its controlled ecosystem, Apple was able to implement a stronger protection (with token pinning for 2FA accounts). We were able to circumvent this protection in Elcomsoft Phone Breaker, allowing you to extract, transfer and make use of these full authentication tokens. The full token can be used on any computer, Windows or Mac; you’ll just need a recent version of Elcomsoft Phone Breaker.

Extracting and Using Authentication Tokens

There are several supported scenarios for extracting authentication tokens.

  • Windows computer, extracting a limited token from the currently signed in account;
  • Windows computer, extracting limited tokens from other accounts;
  • macOS computer, extracting limited and unrestricted tokens from the current user (keychain password required);
  • macOS computer, extracting limited and unrestricted tokens from the keychain database (keychain password required);
  • iOS device, keychain obtained from password-protected backup or via physical acquisition.

Windows, current user

What you need: Elcomsoft Phone Breaker (Forensic Edition). Must be signed in as a user whose token you are about to extract.

Launch atex.exe from the command line. The tool will automatically extract the authentication token. That’s it! You have just extracted the limited, non-transferable token pinned to the current computer (saved into the text file). Note that you can only use the extracted token on the computer you have extracted it from.

Windows, other users

What you need: Elcomsoft Phone Breaker (Forensic Edition). Must be signed in as a user whose token you are about to extract.

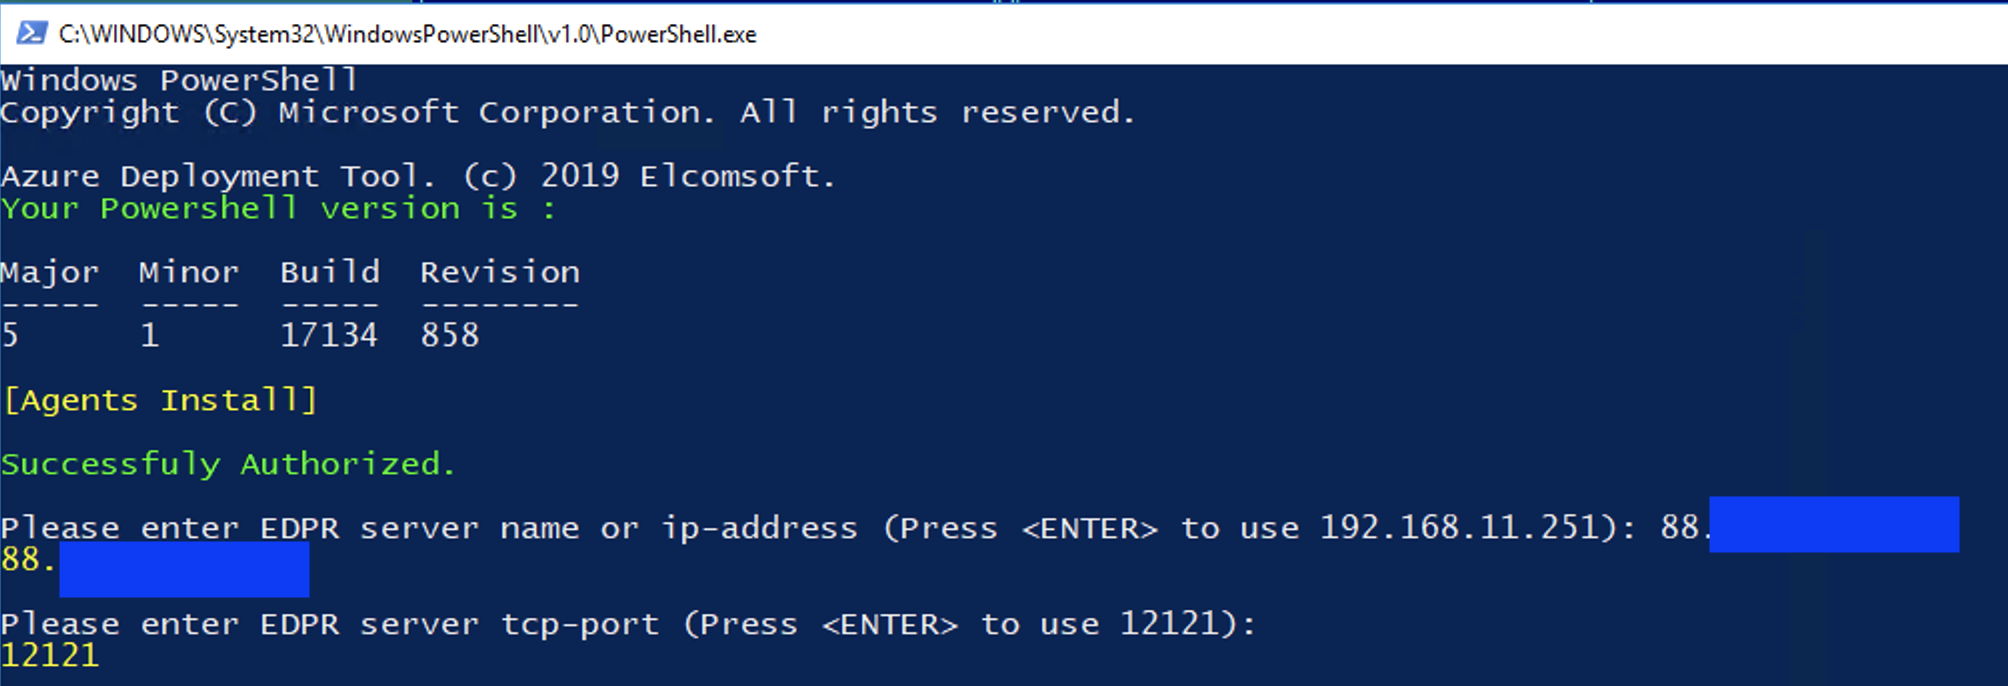
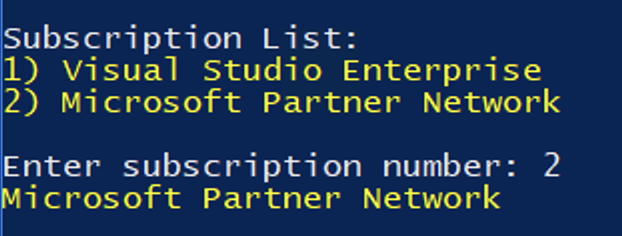
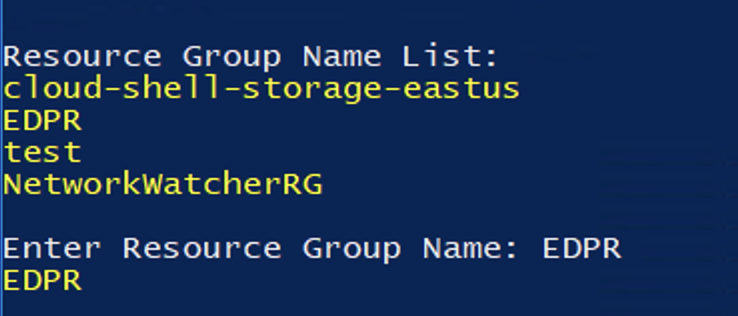
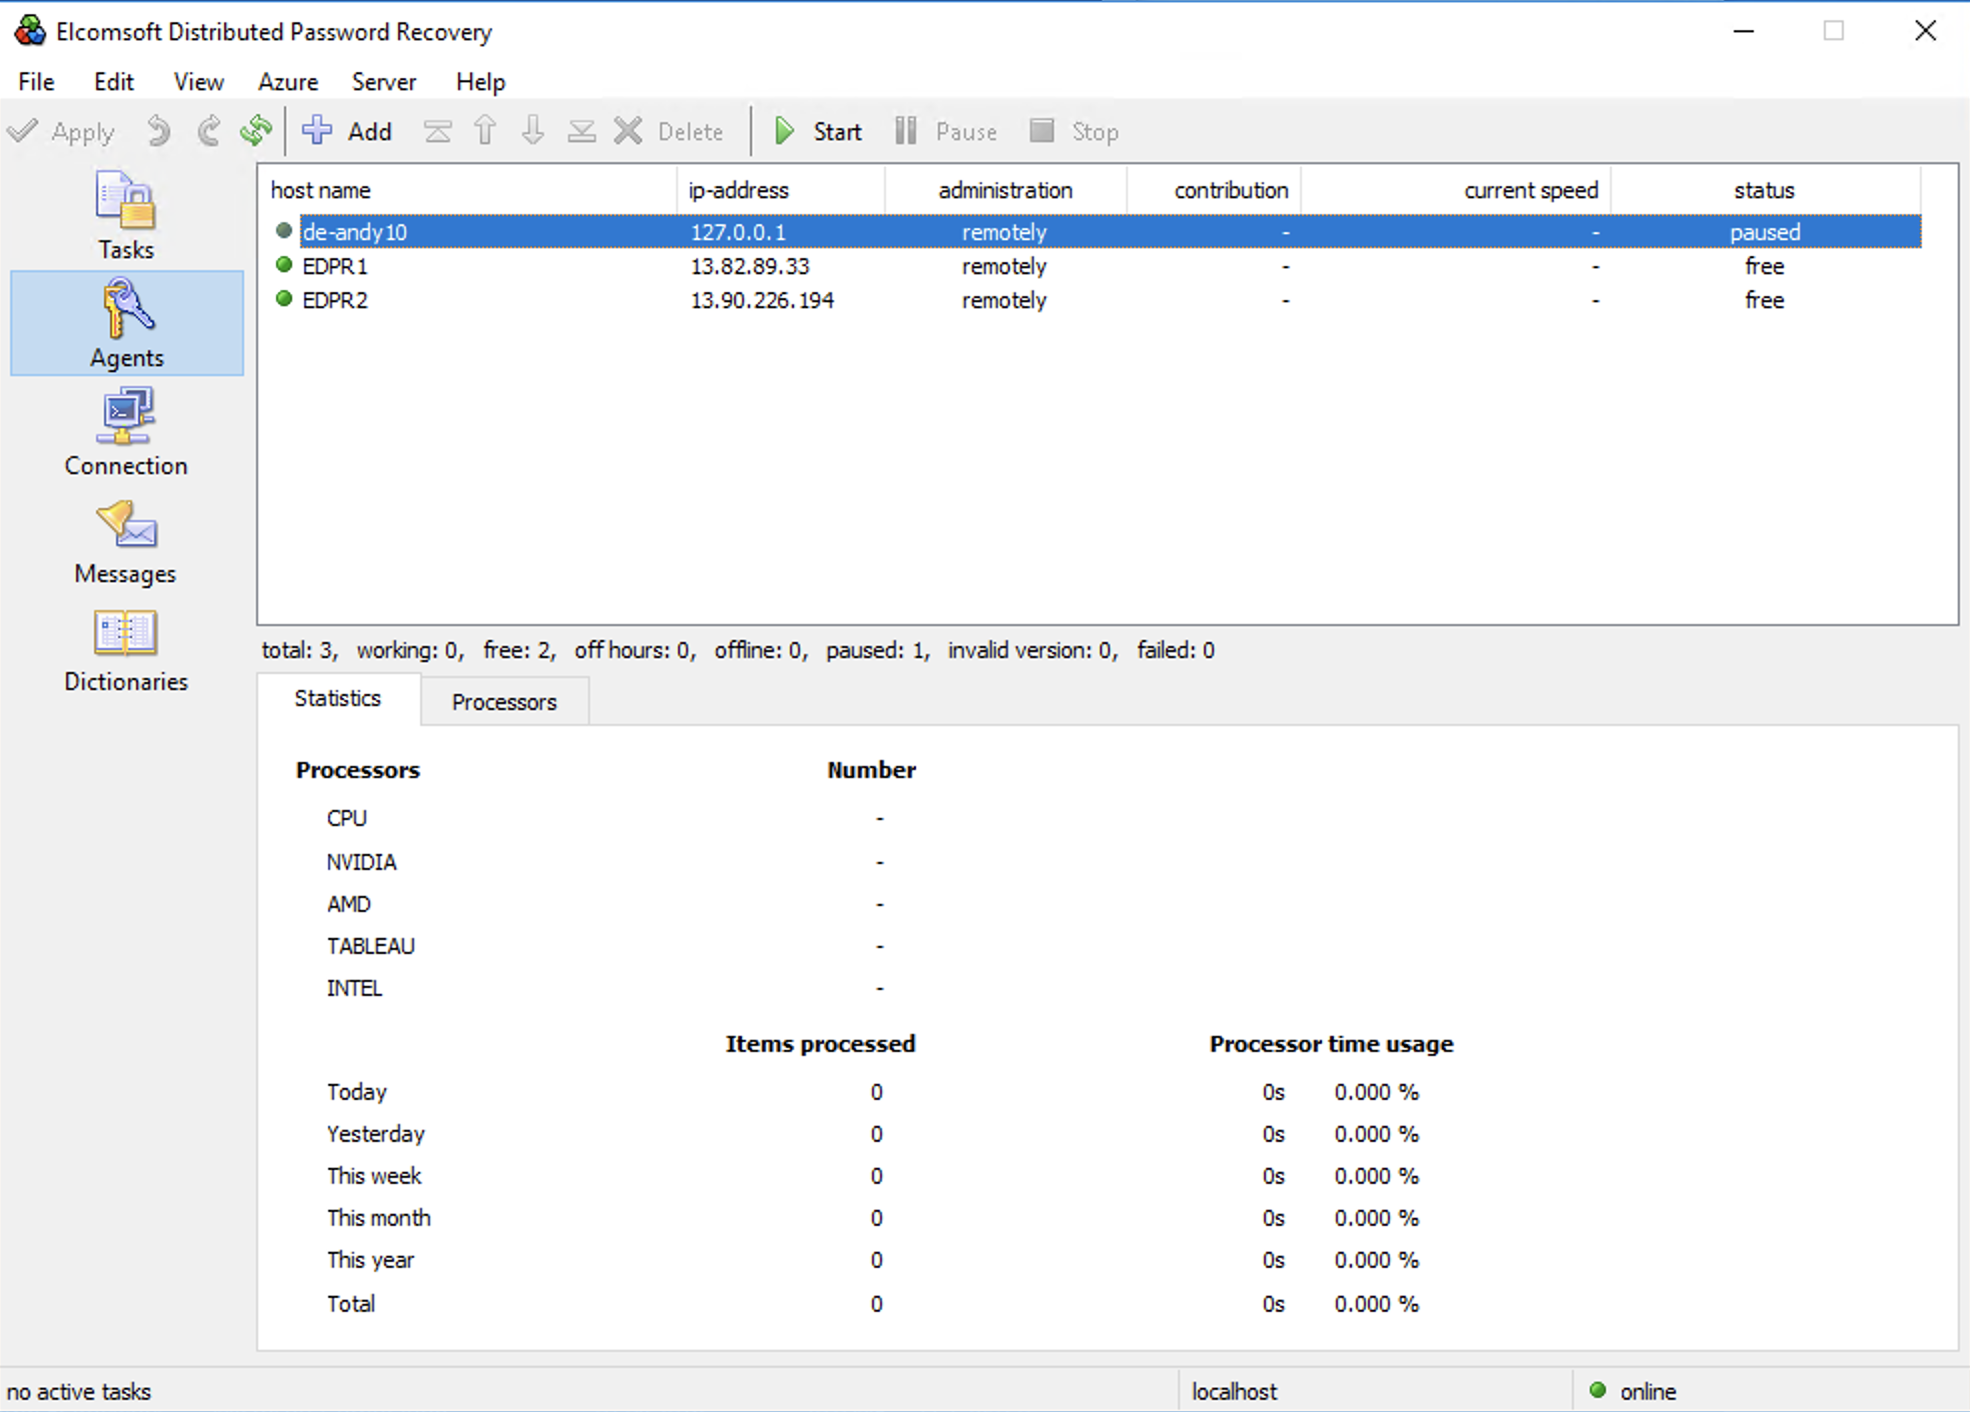
You will be using the main GUI to extract tokens from other users’ accounts. The procedure is very complex; please refer to the User Manual for details.

macOS, current user

What you need: Elcomsoft Phone Breaker (Forensic Edition). Must be signed in as a user whose token you are about to extract. Must know keychain password (often, but not always, the same as account password). Note: extracts both full and limited tokens.

Alternatively, use macOS Keychain utility to extract token.


macOS, other users

What you need: Elcomsoft Phone Breaker (Forensic Edition). Extracted keychain database from the user you’re about to obtain the token from. Must know keychain password.

iOS device

What you need: Elcomsoft Phone Breaker (Forensic Edition). Decrypted keychain database (physical acquisition) or password-protected backup (password must be known).

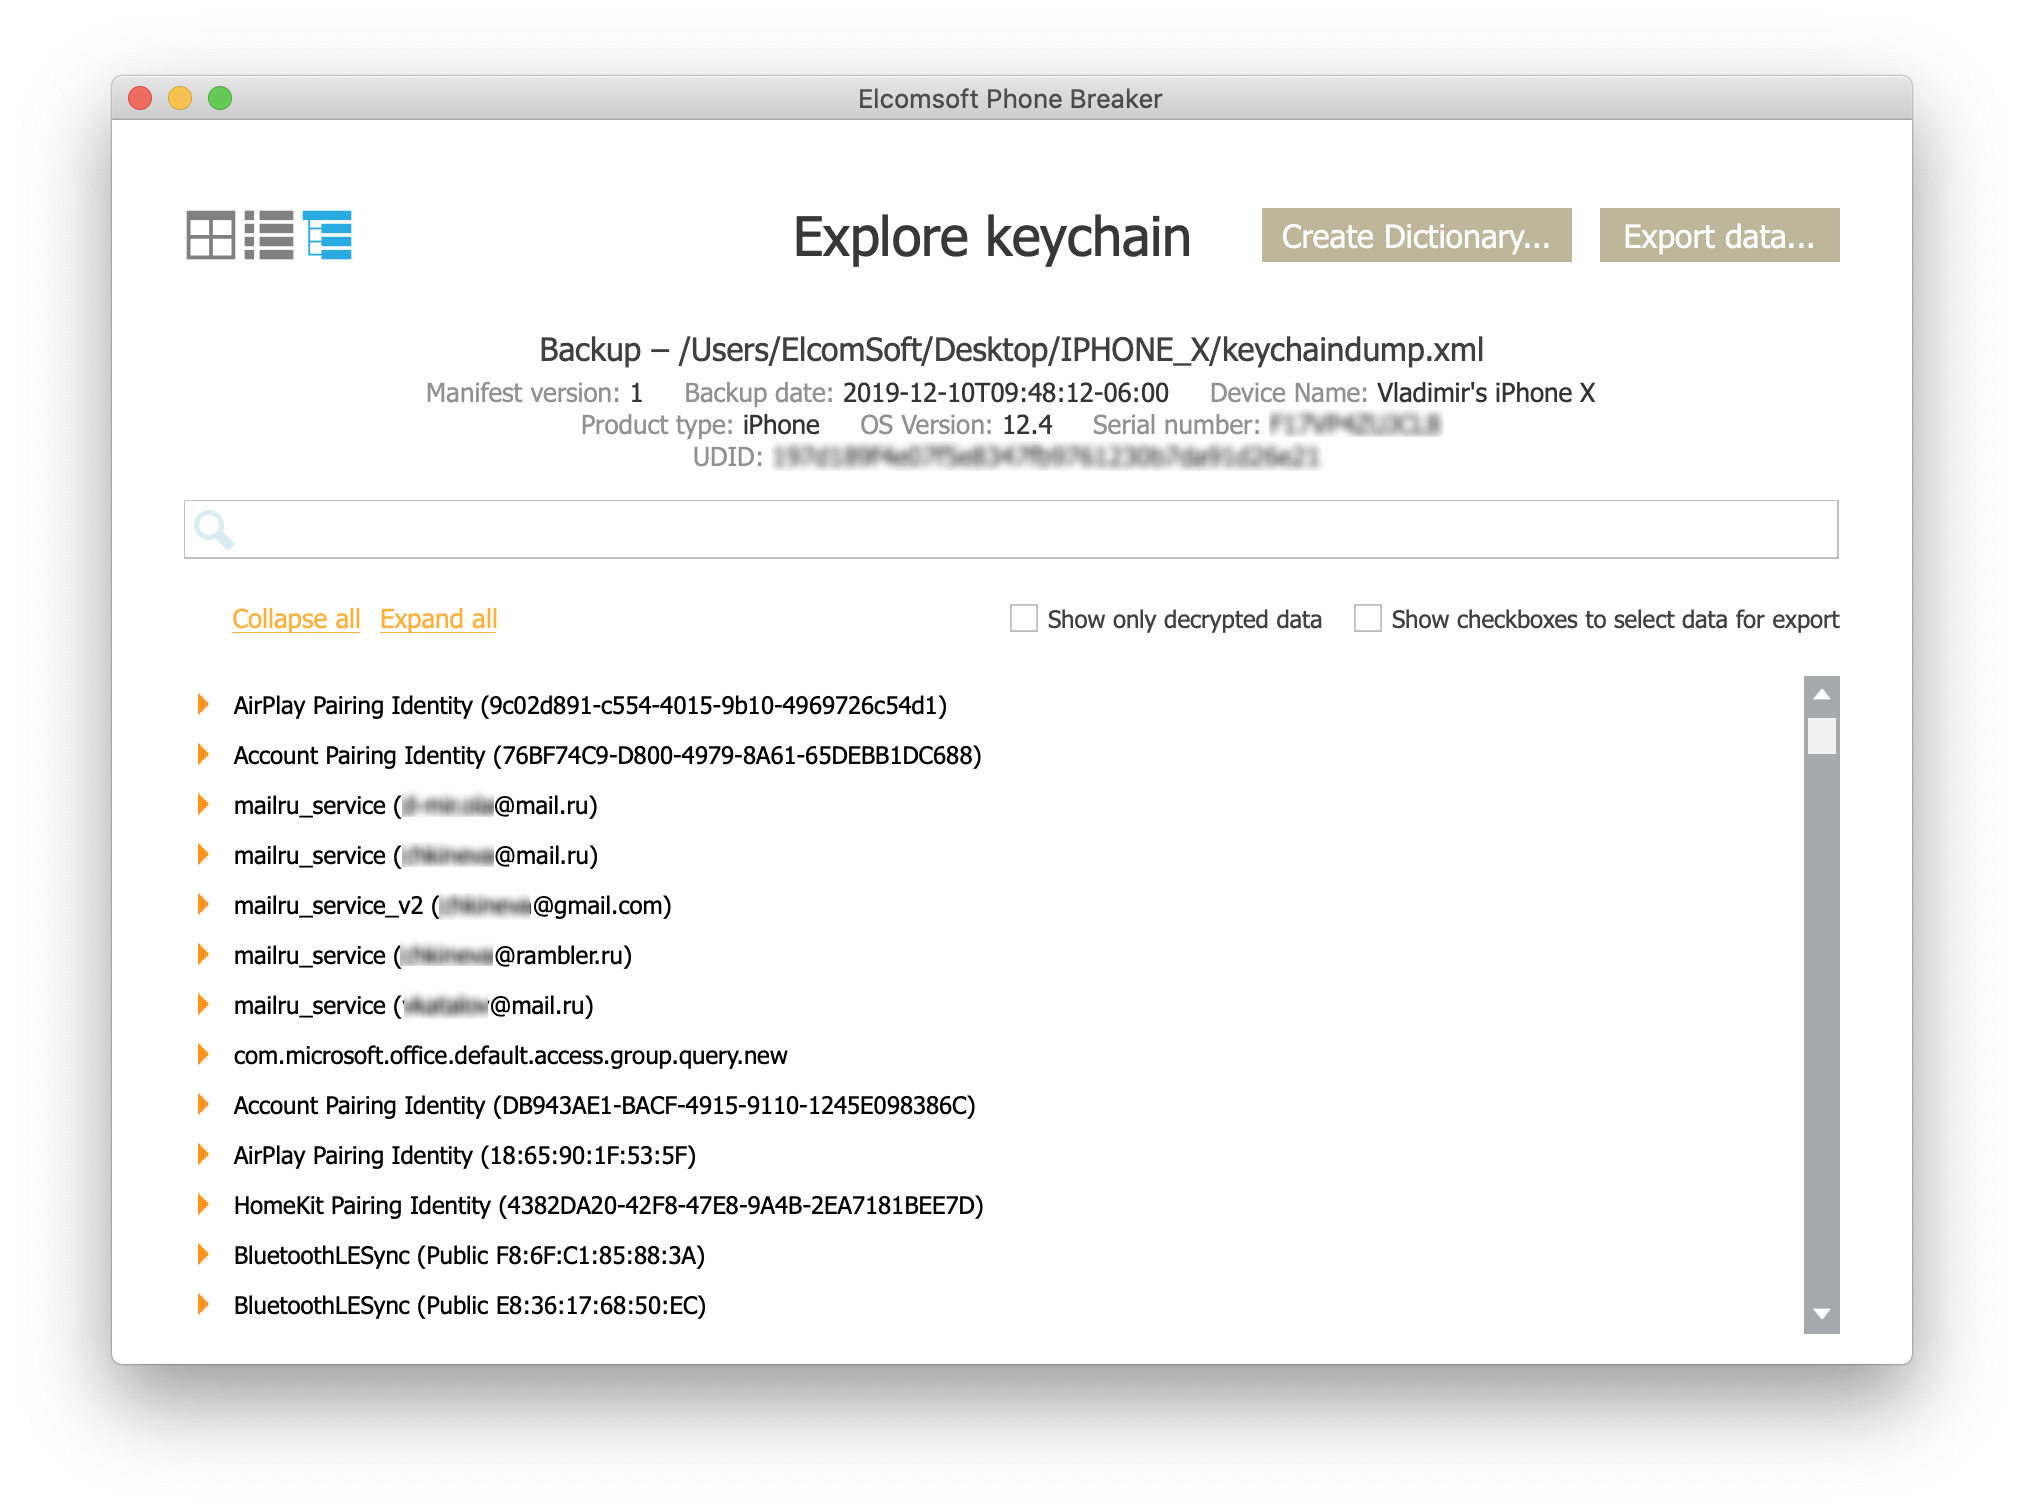
Use Elcomsoft Phone Breaker to manually examine the keychain.

Using Authentication Tokens

What you need: Elcomsoft Phone Breaker (Forensic Edition).

macOS: If you extracted a full (unrestricted) token from macOS, you can copy the file and use it on any computer, Windows or Mac.

Windows: Limited tokens can only be used to authenticate from the same computer they’ve been extracted from.

Limited tokens:


Bonus Chapter: Discovering Authentication Credentials

Since authentication tokens can be restrictive, one can have greater success extracting data from iCloud when using the login and password (and passing secondary authentication for accounts with 2FA). One can try the following methods for obtaining the user’s authentication credentials:

  • Windows: use Elcomsoft Internet Password Breaker to extract stored passwords from the user’s Web browser. These can be usually found in records for “apple.com”, “icloud.com” or “appleid.apple.com”.
  • macOS: use Elcomsoft Password Digger to extract and analyze the macOS keychain. Once again, the login and password can be stored in one of the records that include the words “apple” or “icloud”.
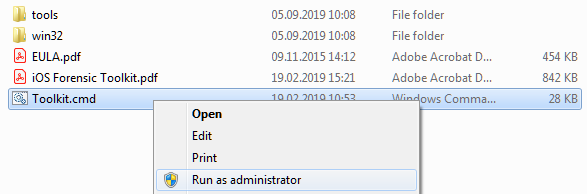
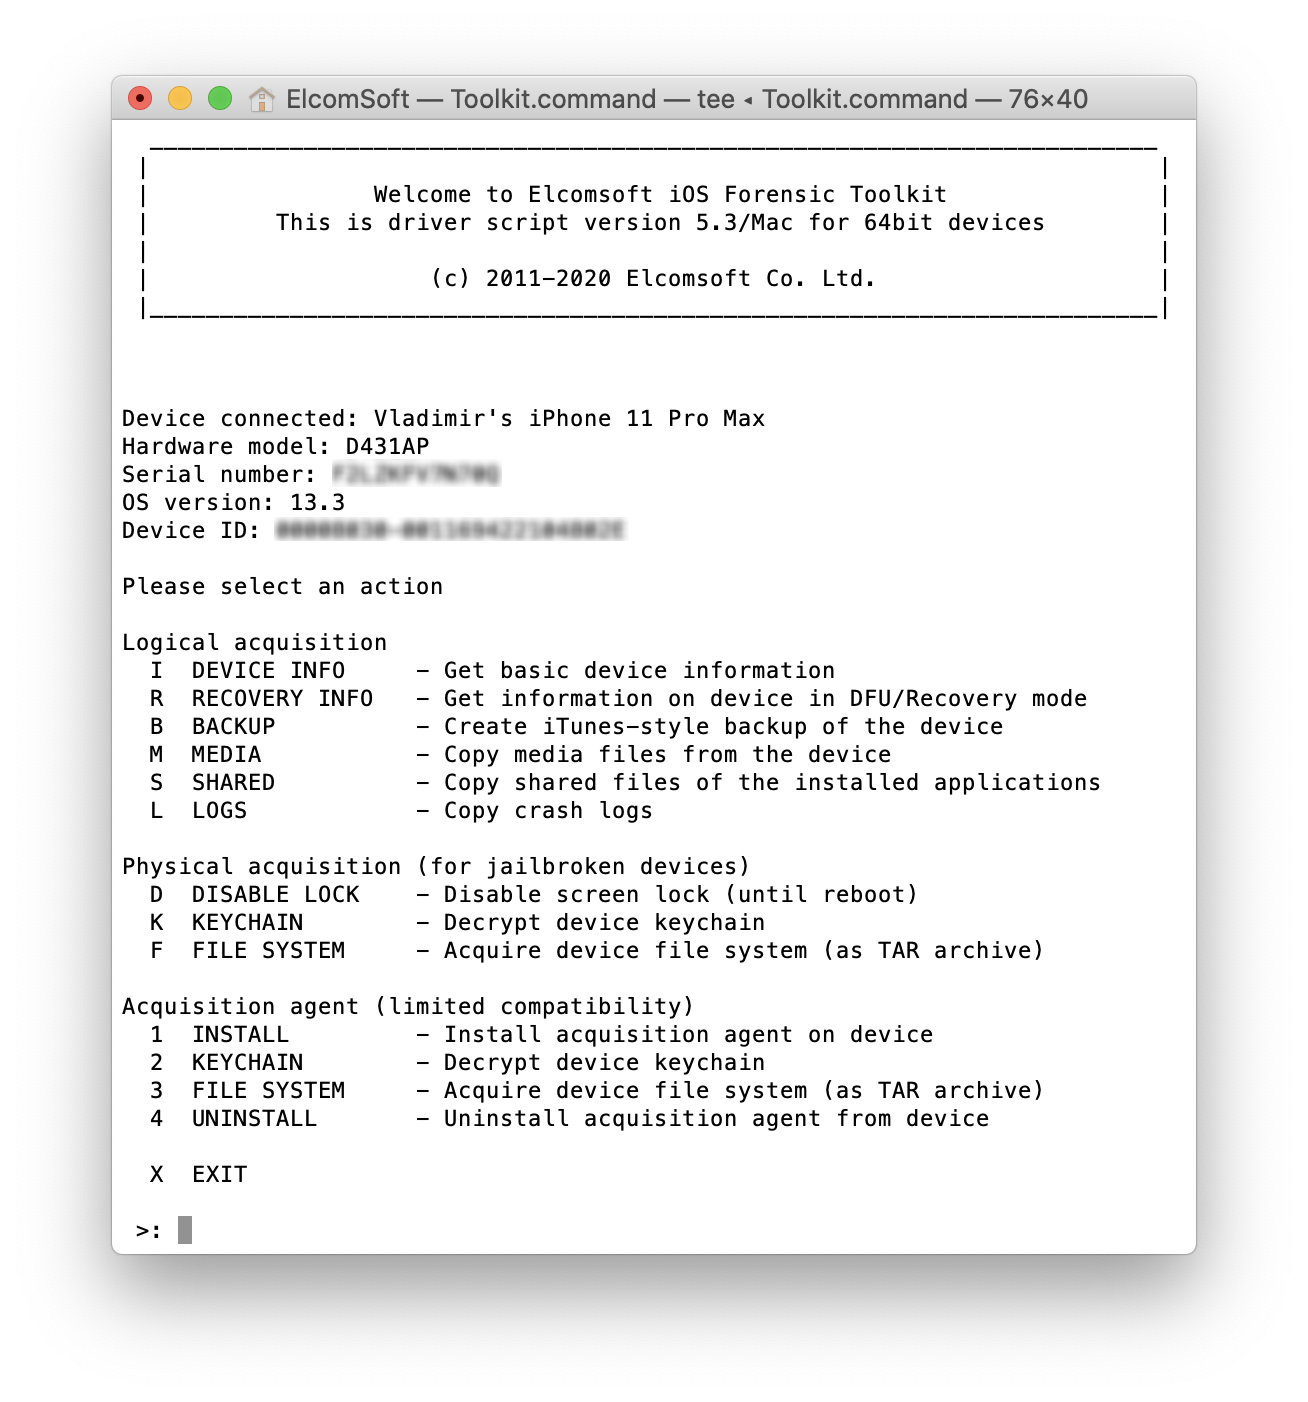
  • iOS: if you are able to extract the keychain from an iOS device (via logical or physical acquisition with Elcomsoft iOS Forensic Toolkit), you can use Elcomsoft Phone Breaker to analyze the keychain. Note: the user’s Apple TV may also contain these passwords, so analyzing it may be a good idea.

Note that you would still have to pass two-factor authentication for accessing accounts protected with 2FA.

Conclusion

iCloud authentication tokens are no longer quite as a handy solution as they used to be just a year ago. Encryption and protection of the token combined with access restrictions make authentication tokens useful for accessing select types of synchronized data. The most interesting types of evidence such as iCloud backups, saved passwords, Health and Messages are not accessible with the tokens.


How To Access Screen Time Password and Recover iOS Restrictions Password

$
0
0

The Screen Time passcode (known as the Restrictions passcode in previous versions of iOS) is a separate 4-digit passcode designed to secure changes to the device settings and the user’s Apple ID account and to enforce the Content & Privacy Restrictions. You can add the Screen Time passcode when activating Screen Time on a child’s device or if you want to add an extra layer of security to your own device.

The 4-digit Screen Time passcode is separate to the main screen lock passcode you are using to unlock your device. If you configure Screen Time restrictions to your usage scenarios, you’ll hardly ever need to type the Screen Time password on your device.

Using the Screen Time password can be a great idea if you want to ensure that no one can reset your iTunes backup password, disable Find My iPhone or change your Apple ID password even if they steal your device *and* know your device passcode. On a flip side, there is no official way to recover the Screen Time password if you ever forget it other than resetting the device and setting it up from scratch. Compared to the device screen lock passcode, Screen Time passwords are much easier to forget since you rarely need it.

In this article, we’ll show you how to reveal your iOS 12 Screen Time passcode (or the Restrictions passcode if you’re using iOS 7 through 11) using Elcomsoft Phone Viewer.

Restrictions Passwords (iOS 7 through 11)

Restrictions passwords (or, rather, restrictions passcodes due to their fixed size of strictly 4 digits) were introduced as means to protect changes to device settings, apps, and the Apple ID account. Restrictions passwords were carried over unchanged all the way to iOS 11.

In these versions of iOS, Restriction passwords were stored on the device in the form of a hash derived from the salted user’s input with the pbkdf2-hmac-sha1 algorithm. Even though 1000 iterations are used to protect the hash, the length and complexity of the passcode were always fixed to exactly 4 digits. As a result, brute-forcing the hash doesn’t take longer than a few seconds on average PCs. All you need to recover the Restrictions password is one of the following:

  • An iTunes backup without a password, or
  • A password-protected iTunes backup with a known password, or
  • A backup downloaded from iCloud, or
  • A file system image obtained with iOS Forensic Toolkit or GrayKey.

Elcomsoft Phone Viewer 4.60 and newer versions can quickly brute-force the Restrictions password in background while the backup is opened. By the time EPV completely loads the backup, the Restrictions password would be already recovered.

In order to reveal the Restrictions password with Elcomsoft Phone Viewer, perform the following steps.

  • Make a local backup of the iOS device using iTunes or iOS Forensic Toolkit, or download a backup from iCloud with Elcomsoft Phone Breaker. For the purpose of recovering the Restrictions password we don’t care if the backup is password-protected or not (however, if the local backup is encrypted with a password, you must know it); you can also work with file system image (.tar or .zip), generated with iOS Forensic Toolkit or GrayKey, respectively.
  • Launch Elcomsoft Phone Viewer and open the local backup or file system image.
  • If the work with backup and it is encrypted, you’ll be prompted for the password. You must then enter the backup password to decrypt the backup.
  • It’ll take a few moments to open the backup. While the backup is being processed, Elcomsoft Phone Viewer detects if the Restrictions password is set, and attacks it in the background. By the time the tool finishes opening the backup, the Restrictions password will be already recovered.
  • The Restrictions password will be displayed on the main window along with other device information.

Screen Time Password (iOS 12)

iOS 12 introduced Screen Time, a much more powerful system compared to Restrictions. The Restrictions passwords were converted to Screen Time passwords. In iOS 12, Apple developers moved away from hashing the password. iOS 12 devices store the original Screen Time password in the device keychain. The record is intentionally untethered: restoring from a password-protected local backup should fully restore the Screen Time password. However, the corresponding record is hidden; you won’t be able to access the Screen Time password when viewing stored passwords on the iPhone itself. You’ll have to make a password-protected local backup in order to decrypt the Screen Time password. You’ll need Elcomsoft Phone Viewer 4.60 or newer and one of the following:

  • A password-protected iTunes backup with a known password.

In order to reveal the Screen Time password with Elcomsoft Phone Viewer, perform the following steps.

  • Make a local backup of the iOS device using iTunes or iOS Forensic Toolkit. If you are using iTunes, try setting a known temporary password. iOS Forensic Toolkit attempts to automatically set a temporary password or “123”.
  • Launch Elcomsoft Phone Viewer and open the local backup.
  • When prompted, enter the backup password.
  • After the backup is opened, the Screen Time password will be displayed on the main screen along with other device information.

Screen Time Passwords in iOS 13

iOS 13 makes use of Screen Time passwords just like iOS 12. However, the exact location of the password has been changed in iOS 13. At this moment, Elcomsoft Phone Viewer won’t help you extract Screen Time passwords from iOS 13 backups.

Screen Time and iCloud

Under certain circumstances, Screen Time passwords may be stored in iCloud. We were able to extract such passwords from the cloud; you’ll need to wait for an updated version of Elcomsoft Phone Breaker to extract them.

How to Extract and Decrypt Signal Conversation History from the iPhone

$
0
0

With over half a million users, Signal is an incredibly secure cross-platform instant messaging app. With emphasis on security, there is no wonder that Signal is frequently picked as a communication tool by those who have something to hide. Elcomsoft Phone Viewer can now decrypt Signal databases extracted from the iPhone via physical (well, file system) acquisition, and that was a tough nut to crack.

What exactly makes Signal so difficult to crack? Let us first look at how one can gain access to users’ communications occurring in other instant messengers.

Interception: the MITM attack

The first method is interception. One can attempt to intercept conversations in transit. This in turn is very difficult as everyone is touting point-to-point encryption. While technically the traffic can be intercepted, decrypting it will require a malicious app installed on the end-user device (such as the infamous NSO Group spyware). Without direct government intervention or proposed encryption backdoors one can hardly ever intercept messaging with a MITM attack. It is very important to understand that even if your iPhone is secure, the other party’s device running the iOS, Android or desktop app (which is much easier to break) might be compromised. If the other party is compromised, all your communications with that party will be compromised as well.

Signal implements special protection measures against MITM attacks, making certificate spoofing useless and complicating malware-based attacks.

Cloud Extraction

Fortunately for the law enforcement, most instant messengers sync and store communications using their own cloud service. Apple syncs iMessages through iCloud, Microsoft keeps Skype conversations in the user’s Microsoft Account, Telegram has its own cloud service to sync all but private chats, and so on. While all of those companies tell users their data is stored securely encrypted, all but Apple readily provide data to the law enforcement when served with a legal request. (Apple does not as the company allegedly does not have access to the encryption keys; this didn’t stop us from accessing cloud messages anyway.)

Let us make it clear. With cloud storage readily available, one can access the user’s conversation histories by either serving a legal request or by logging in with the user’s account credentials. We’ve been able to do the latter for iMessages; while difficult it’s not impossible.

Signal does not store messages, conversation histories or encryption keys in the cloud, period. There is nothing to request (except some metadata, may be) and there is nothing to access even if one signs in with the user’s credentials.

Backups

Some messengers do keep their conversation histories in backups and some don’t. For example, iMessages can be extracted from password-protected backups if (and only if) the Messages in iCloud option is not enabled in the device settings. We haven’t seen Telegram conversations backed up, but WhatsApp allows its database in the iCloud backup and also in its own stand-alone backup in iCloud Drive for iOS or Google Drive for Android. While stand-alone backups are encrypted, one can decrypt them using Elcomsoft eXplorer for WhatsApp.

It can be hit or miss with other messengers. Signal does not allow its conversation histories or encryption keys in local backups, even those that are protected with a password.

Extracting from the Device

Extracting a working database always works. WhatsApp, Skype, Telegram and iMessage databases are stored in plain SQLite format; they are never encrypted (other than using the system’s full-disk encryption feature).

Unlike all of those other messengers, Signal encrypts its working databases. The encryption key is generated the first time the user signs in to Signal on the device. The key is then stored in the keychain, protected with a high protection class. Without that key one can only extract attachments (pictures, documents, voice messages etc.)

Why Signal Is Secure

Just like Telegram, Skype and WhatsApp, Signal protects communications with secure point-to-point encryption. What makes it different to many every other instant messaging app on the market is the fact that Signal never syncs conversations with the cloud. In addition, the app for Android and iOS platforms takes care to never back up conversation histories into the corresponding cloud service (Google Drive and iCloud respectively). As a result, there’s nothing to get in the cloud, and there is virtually no relevant information about the user’s communications that law enforcement could request from Apple, Google or Signal itself. The icing on the cake is the fact that Signal does not allow its working database to be backed up locally (via iTunes or third-party tools); not even into encrypted backups.

According the the developers, “Signal messages and calls are always end-to-end encrypted and painstakingly engineered to keep your communication safe. We can’t read your messages or see your calls, and no one else can either.” As we have seen, this statement true. However, the app must still have access to conversations, which means they must be stored somewhere on the device.

The point is, of the three vectors of attack (logical, physical and cloud) neither cloud nor logical acquisition are available. The only way to obtain Signal data that includes the user’s communications is physical acquisition and physical acquisition only.

The Issue of Encryption

Okay, great, physical (sort of) acquisition it is. After extracting the Signal database from the iPhone’s file system image, accessing the data will be extremely difficult due to the custom encryption scheme implemented by Signal. There is no password protecting the database; the encryption key is generated from random seed during initialization, then stored in the iOS keychain with a high protection class. The high protection class means that the key is not exported into iCloud (in fact, it is exported, but encrypted with the device-unique hardware key) and cannot be decrypted when analyzing a password-protected backup.

Breaking Signal Encryption

In order to decrypt Signal conversation databases extracted from the iPhone via file system acquisition, you will also need to extract the encryption key from the keychain. If you are using Elcomsoft iOS Forensic Toolkit, make sure to capture the keychain along with the file system image.

To decrypt and analyze a Signal conversation history, open the file system image in Elcomsoft Phone Viewer and use the extracted keychain file to decrypt the Signal database. Elcomsoft Phone Viewer will then decrypt the database and display its content in a blink of an eye.

Follow these steps to decrypt the Signal database:

  1. Have the following readily available: file system image (.tar or .zip) and decrypted keychain extracted with Elcomsoft iOS Forensic Toolkit (keychaindump.xml by default).
  2. Launch Elcomsoft Phone Viewer and open the file system image.
  3. Once the file system image fully loads, have a look at the Signal icon. Note the red “encrypted” key on that icon.
  4. Click on the Signal icon. You’ll be prompted to provide path to the keychain file. Select the keychain file to decrypt the database. The icon will change to “decrypted” (no red key anymore).
  5. Once the database is decrypted, you can browse and view its content.

iOS 12.4 File System Extraction

$
0
0

The iOS 12.4 jailbreak is out, and so is Elcomsoft iOS Forensic Toolkit. Using the two together, one can image the file system and decrypt the keychain of iPhone and iPad devices running most versions of iOS (except iOS 12.3 and and the latest 12.4.1, but 12.4 is still signed right now).

There is more to this jailbreak situation than meets the eye. There is not one but two different jailbreaks: unc0ver and Chimera. Both jailbreak tools come in several versions; the differences between their versions are severe. There is also a tool that can access the file system (but not the keychain) on some iOS devices without a jailbreak. Finally, we’ve been able to jailbreak the Apple TV running affected versions of tvOS.

In this article I’ll explain the differences between the two jailbreaks and their versions, provide information about the tool one can use to access the file system without jailbreaking, and provide instructions on how to safely jailbreak in offline mode.

The Exploit

The SockPuppet Flaw (CVE-2019-8605) discovered by Google Project Zero researcher Ned Williamson in iOS 12 and previously patched in iOS 12.3 was unpatched by Apple in iOS 12.4. The vulnerability in the XNU kernel in both iOS and macOS was patched by Apple in May 2019 in iOS 12.3.

The vulnerability exists in all versions or iOS 11, iOS 12.0-12.2, and iOS 12.4. All generations of Apple hardware from A7 through A11 are fully affected, while the latest A12 and A12x devices are “partially affected” (full table). The jailbreaking comminute had since discovered the chain of exploits required to achieve tfp0 on all affected devices including the A12 (iPhone XS, iPhone XS Max, iPhone XR, iPad Mini (2019), iPad Air (2019)) and A12x (iPad Pro (11” and 12.9”)).

“In July 2019, Williamson released SockPuppet and SockPuppet2, exploit code that “achieves kernel_task port” or task_for_pid(0) (tfp0), which is highly sought after for jailbreaking Apple devices” (Tenable). The exploit code was picked up by jailbreak developers and led to the release of unc0ver jailbreak.

Apple patched the vulnerability again in iOS 12.4.1. As a result, iOS 12.3, 12.3.1, 12.3.2, iOS 12.4.1 and iOS 13 (beta) are not affected.

unc0ver

The first jailbreak exploiting the vulnerability was unc0ver. At the moment, unc0ver still is the less reliable jailbreak on some devices (especially on thise running iOS 12.4). However, it’s the most compatible one as it supports all versions of iOS 11 and iOS 12 up to 12.4 with the exception of iOS 12.3.x.

unc0ver is a classic jailbreak featuring file system remount and Cydia package manager. There is one exception: unc0ver 3.5.5 works as a “partial” jailbreak for A12 and A12x devices (the iPhone Xs/Xr generation). This particular version does not remount the file system on the A12(x) devices; however, it still provides a working SSH daemon (you can select from OpenSSH and Dropbear) and access to the file system. In a sense, unc0ver 3.5.5 is similar to the rootless jailbreak when used on A12(x) devices only. We recommend unc0ver 3.5.5 on A12(x) devices. If you go with unc0ver on a different generation device, get the newest versions of the jailbreak.

Chimera (iOS + tvOS)

Chimera was the second jailbreak released for iOS 12.4. Chimera comes from a different team with a different philosophy. Chimera developers opted to use the new package manager Sileo as opposed to Cydia in unc0ver; tweaks are injected with Substitute (Chimera) as opposed to Cydia Substrate (unc0ver). Interestingly, unc0ver developers have decided to use Substitute on A12 and A12x devices as Cydia Substrate is difficult or impossible to run on this hardware.

Chimera download link: https://chimera.sh/

The choice of the package manager and tweak injection methods in fact affects forensic experts. What is important:

  1. File system remount. Generally speaking, we don’t want file system remount on devices we want to extract data from. unc0ver 3.5.5 is the only jailbreak that does not remount the file system — but for A12 devices only.
  2. The bundled SSH daemon. We need SSH to connect to the device. unc0ver has an option to install OpenSSH or Dropbear; looks like the first one is a bit more reliable. Chimera uses Dropbear.
  3. A12 and A12x support (iOS 12.2, 12.4). Only unc0ver supports A12(x) devices; Chimera does not (at the time of this writing).
  4. tvOS support. If you are working on an Apple TV 4 or 4K device, Chimera is the only choice available.
  5. Reliability. Chimera is far more reliable than unc0ver, as we have found. With unc0ver, we often got random device reboots, or not all the files have been copied and save into .tar archive, or keychain did not extract etc.

Between the two jailbreaks, we strongly recommend using Chimera for most devices and iOS versions, while unc0ver is the only option for iPhone Xr/Xs (as well and 3rd gen iPad Pro) running 12.2 or 12.4; again, we recommend using version 3.5.5 of unc0ver. Please also note that Chimera is the only jailbreak that supports Apple TV running tvOS 12 (more on Apple TV data analysis here).

Chimera is also the only jailbreak we can use with iOS 12.2 and 12.4 to decrypt the keychain.

GeoFilza

Did you know you can access the file system without even jailbreaking? GeoFilza is a file manager for iOS devices running iOS 12.0 to iOS 12.1.2. The tool is made by the security researcher GeoSn0w.

GeoFilza can access the file system by exploiting the vulnerability in iOS 12 through 12.1.2 without jailbreaking. GeoFilza is a clean and simple way to access locked data on the device. However, exporting the data to the computer with GeoFilza is a bit troublesome, though you can use iCloud Drive or Dropbox.

Unfortunately, GeoFilza is not available for iOS 12.4 yet.

Installing the Jailbreak: The Issue of Certificates

Quite a lot has been published about jailbreaking. We have a comprehensive write-up on the subject of installing the jailbreak for physical extraction; read it here in our blog. While that blog post explains everything in great detail, I feel the whole issue of using developer certificates for installing jailbreaks needs to be clarified.

Why do we even need the iOS device to go online while jailbreaking? Because iOS will not run sideloaded apps if they are not signed with a trusted certificate. Cydia Impactor signs the jailbreak IPA on your computer with the Apple ID of your choice. Remember the “trusted” part? iOS still won’t run the sideloaded IPA unless you open the Settings app and “trust” the signing certificate. As you do this, iOS will talk to Apple servers to verify if the signature can be trusted; and this is why the Internet connection is required to jailbreak.

One of the greatest risks of jailbreaking in a forensic lab is exposing the device to the outside world. By allowing the device going online at any time, you are effectively allowing the device to synchronize information, download data that was not available on the device at the time the device was seized. In worst case scenario, you make the device susceptible to pending remote block or remote erase commands.

To avoid all of those complications, it is essential to keep devices offline during all stages of the acquisition process. This helps prevent data leaks and unwanted synchronization and avoids remote device management commands that may remotely block or erase the device.

There are several solutions to this problem. Some experts configure a dedicated Wi-Fi access point to allow connected devices accessing only a few whitelisted IP addresses (such as ppq.apple.com). While this works, enabling Wi-Fi on the device even briefly may still leave room for accidentally connecting to the wrong Wi-Fi network with full connectivity. This would be bad as receiving a remote erase command only takes a brief moment.

As a workaround, some experts connect the device to a chain of two adapters: a Lightning to USB adapter and a USB to Ethernet adapter (or just Lightning to Ethernet; we got a couple of those but did not try them yet). Ethernet is much easier to control, allowing the device to connect to the certificate validation server without the slightest chance of talking to the wrong server.

Finally, you can use reverse internet tethering to enable the iPhone to connect to the Internet through the host computer. Still, you need to whitelist the addresses needed for certificate approval.

There is an easier solution to the dilemma. Instead of using a personal certificate for signing the jailbreak IPA, you can use a developer certificate for that purpose. The developer certificate allows sideloaded apps to run on the iPhone (up to 100 per account) without the need to additionally verify or “trust” the certificate. In other words, if you sign the jailbreak IPA with a developer certificate, you can simply tap the jailbreak icon, and it will launch immediately. No certificate verification and no talking to Apple servers required.

Obtaining a Developer Certificate

Developer certificates are only available to registered Apple developers. In order to become a registered Apple developer, you’ll have to enroll in the Apple Developer Program. When starting the enrollment, make sure to enroll as an organization; individual developer certificates still require additional validation on the device. You’ll need to submit your D-U-N-S number and pay the fee. Once your enrollment is approved, you will be able to add your Apple ID accounts to the program, and use them to sign IPA files sideloaded to the device.

Do note, however, that every time you use your developer certificate to sign the jailbreak IPA on a new iPhone, that device becomes enrolled in the developer program. The number of iOS devices you can have enrolled is limited. Make sure to remove the iOS device from your Apple Developer account after the extraction.

iOS Forensic Toolkit Tips and Tricks

In our Step by Step Guide to iOS Jailbreaking and Physical Acquisition we described pretty much everything one needs to know about using Elcomsoft iOS Forensic Toolkit for extracting the file system and decrypting the keychain. I won’t repeat the steps here, just mention some tips and tricks that will help you make the process smoother.

Unlock the iPhone before connecting to the computer. iOS may have disabled the USB port with USB restricted mode. If this is the case, the computer won’t be able to detect the iPhone until you unlock it.

Disable Internet connectivity (on both devices). We are always instructing users to ensure that the iOS device being acquired remains in Airplane mode with Wi-Fi, Bluetooth and Mobile data toggles all disabled. If you still experience weird connectivity issues, try disconnecting the iPhone from the computer and close all EIFT terminals (in Windows, there will be an additional terminal window to maintain SSH connection). After that, disable all wired and wireless networks on the computer, then re-launch EIFT and repeat the extraction. This is not the usual “unplug and wait for one minute” type of suggestions you receive from first-level customer support when calling about a weird issue. Disabling network connectivity on your computer helps to ensure that the computer establishes the SSH connection with the right device (we’ve seen cases where EIFT connected to a random iPhone in the room that was connected to the same access point as the expert’s computer).

Verify pairing relationship (or use a lockdown file). If something does not work, make sure that the iOS device has been paired to your computer (trusted relationship established or a valid pairing/lockdown file used).

Unlock iOS device screen and keep it unlocked at all times during the acquisition. We have the “D” (Disable screen lock) command for this purpose. Unlock the device and use the command before you extract the file system or attempt to decrypt the keychain. If you don’t, some items marked as “when unlocked” will not be accessible during the extraction.

Do not remove the passcode! Otherwise, you will lose access to certain types of evidence such as Apple Pay transactions, downloaded Exchange mail and some other data.

Use the device passcode. When you extract the keychain using iOS Forensic Toolkit, passcode prompt may appear on the device. Pay attention to that! And enter it of course. Otherwise, keychain will not extract.

More tips (specific to Windows platform) available here.

iOS Acquisition on Windows: Tips&Tricks

$
0
0

When you perform Apple iCloud acquisition, it almost does not matter what platform to use, Windows or macOS (I say almost, because some differences still apply, as macOS has better/native iCloud support). Logical acquisition can be done on any platform as well. But when doing full file system acquisition of jailbroken devices using Elcomsoft iOS Forensic Toolkit, we strongly recommend using macOS. If you are strongly tied to Windows, however, there are some things you should know.

Starting the toolkit

First of all, you have to start the toolkit with Administrator privileges – even if you are logged to the system as Admin. This is quite simple: simply locate the main program script (Toolkit.cmd) in Explorer, right-click on it and select Run as administrator.

The USB dongle supplied with your toolkit dongle should be already inserted. New (console) window is opened, and here is what you get there:

Your license code (IOFT-…) is the first thing printed there; you may need it when contacting our technical support or for license renewal.

Once you press ENTER on this screen, toolkit prompts for SSH port number for connection. Just press ENTER if you are going to use (advanced) logical acquisition only. If your device is 64-bit, running iOS 10 and have Meridian jailbreak installed – enter 2222 (and ENTER). For all other iOS versions and jailbreaks (btw, we recommend using doubleH3lix for iOS 10), then also use default 22.

Tunneling

To acquire data from jailbroken devices, we establish the connection first. Right after you confirmed the port number, another window should open:

If it does not, something is wrong. We do our best to detect why connection cannot be established (and in this case, toolkit prints an error message and quits); still, there is an easy way to verify. Open command prompt, go to win32 folder of the toolkit and run the following command:

itunnel_mux.exe --iport N --lport 3022

(where N is the port number: 2222 for Meridian or 22 for all other jailbreaks, or if you do not work with jailbroken devices at all)

One possible error that may appear is:

[ERROR] Error 0x36B1 (14001): 'Unknown error'
[FATAL] Could not load .\iTunesMobileDevice.dll: ABORTING

In this case, simply install Microsoft Visual C++ 2005 Service Pack 1 Redistributable Package MFC Security Update.

Another important thing about this (tunnel) window is: you should NOT close it while toolkit is working. At the same time, when you exit from toolkit (by pressing ‘X’ in its menu, or by closing its main window, or by pressing Ctrl-C), this window remains open. At that time, you should close it manually before working with any other device.

Working with file system copy

I will not cover all the details about file system acquisition here – please follow the product manual and our other blog articles. However, there is a couple other things are specific to Windows.

So well, you get the full file system image, now what?

For 32-bit devices (now they are supported by older version of toolkit only), we were able to perform real physical acquisition by creating the bit-by-bit image. Such kind of image (DMG) was easier to work with, as you can simply mount it to the system (natively on macOS, or using 3rd party software on Windows).

For 64-bit devices, we can only get full system copy, including the files that you cannot get with logical acquisition, i.e. iTunes backup). So the data is in fact the same as with real physical acquisition (you may think of unallocated space, but forget it: for iOS, it is not technically possible to recover anything at all from it). The main difference is: file system is acquired as a .tar (tarball) archive. There are many reasons to use .tar instead of more popular .zip, but are now going to concentrate on what you can do with that archive.

The first and most obvious way is: simply open it in forensic tool or your choice. We recommend using our own Elcomsoft Phone Viewer for that – it is lightning fast, process the most critical data (evidence?), present it in a very convenient way (instead of huge complex tables like in most other packages), and of course can export it into Excel for further processing. But several other programs exist (and most of them support .tar archives).

However, you may need to analyse the data manually – there is no program on the market that work with ALL kinds of files (there are typically tens or hundreds thousand files on iOS devices).

First of all, always keep the original .tar archive even after unpacking it. When working with unpacked data, you may accidentally delete something, change the file properties, or modify some SQLite database and lose some important (deleted?) data by just opening it, as accompanying WAL (write-ahead log) will be merged.

As for unpacking itself, there is also a couple extremely important point (working on Windows, I think you remember).

First, run the .tar unpacking software (whether it is command-line tar itself or WinRAR) with Admin privileges, like you did that for toolkit itself. Otherwise, symbilic links (widely used on iOS) will not be restored; you are not going to lose any data, but with symlinks, the data is easier to navigate. Yes, Windows (even Windows 7) supports symlinks.

Second, it is better to unpack to the disk formatted with APFS – this is native Apple file system, used on most devices. You will have to install something like APFS for Windows by Paragon Software though. Otherwise (if you have NTFS drive only) some files simply will not be extracted because of using some special characters in their names.

Third (and probably the most important), Windows surprisingly has 260-character limit in file/path names by default, and so many files from .tar simply will not be extracted. Sounds crazy but true. Workaround? Enable using longer file names – it is possible starting with Windows 10 Anniversary Update. That can be done through Group Policy or by manual registry editing.

Conclusion

Again, we recommend using macOS for data acquisition – faster (yes, we compared), simpler (no dumb tunnel window and things like that), more reliable (‘thanks’ to Microsoft drivers) and all that. Still, Windows is still the main forensic platform for some reason, probably because most forensic companies do not have macOS versions of their software. But we do (and BlackBag is another good example – we love their software). Doing cloud forensics? Then macOS is preferred platform, too; our Elcomsoft Phone Breaker works better there.

How to Extract Screen Time Passcodes and Voice Memos from iCloud

$
0
0

The Screen Time passcode is an optional feature of iOS 12 and 13 that can be used to secure the Content & Privacy Restrictions. Once the password is set, iOS will prompt for the Screen Time passcode if an expert attempts to reset the device backup password (iTunes backup password) in addition to the screen lock passcode. As a result, experts will require two passcodes in order to reset the backup password: the device screen lock passcode and the Screen Time passcode. Since the 4-digit Screen Time passcode is separate to the device lock passcode (the one that is used when locking and unlocking the device), it becomes an extra security layer effectively blocking logical acquisition attempts.

Since users don’t have to enter Screen Time passcodes as often as they are required to enter their screen lock passcode, it is easy to genuinely forget that password. Apple does not offer an official routine for resetting or recovering Screen Time passcodes other than resetting the device to factory settings and setting it up as a new device (as opposed to restoring it from the backup). For this reason, the official route is inacceptable during the course of device acquisition.

Unofficially, users can recover their Screen Time passcode by making a fresh local backup of the device and inspecting its content with a third-party tool. In iOS 12, the Screen Time passcode can be only recovered from password-protected backups; in iOS 13, the passcode cannot be obtained even from the local backup. If local backups are protected with a password not known to the expert, the situation becomes a deadlock: one cannot reset an unknown backup password without a Screen Time passcode, and one cannot access the Screen Time passcode without decrypting the backup.

Elcomsoft Phone Breaker 9.20 offers an effective solution to the deadlock by obtaining Screen Time passcodes from the user’s iCloud account. The tool supports all versions of iOS 12 and 13.

Why Forensic Experts May Need the Screen Time Passcode

Even if no further restrictions are configured on the user’s device, the sole presence of the Screen Time passcode on the device means that certain features remain inaccessible. The most needed feature locked by the Screen Time passcode is the ability to reset unknown passwords protecting local (iTunes) backups.

iTunes backups are a major source of data during the course of logical extraction. If the backup is protected with a password, its entire content gets encrypted. Attacks on the password are extremely slow (around 100 passwords per second when using a GPU-assisted attack). While iOS 11, 12 and 13 do allow resetting the backup password from the device settings, one needs to enter the device screen lock password in order to do the reset. If the user has a Screen Time passcode, you will need to enter that passcode in addition to the screen lock passcode. Knowing the Screen Time passcode, you can remove this additional layer of protection and proceed to resetting the local backup password.

Screen Time iCloud Sync

Since iOS 12, Screen Time information can be synchronized to iCloud if the user activates the Share across devices feature. In addition to Screen Time passcodes, the system will synchronize comprehensive usage statistics of all devices enrolled in “Share across devices” and connected to the same iCloud account. If one or more child accounts are configured for the family, each child can have their own Screen Time password, which typically is different from their parents’ passwords.

By extracting and analyzing Screen Time information, experts can extract Screen Time passwords, thus gaining the ability to remove Screen Time protection and/or to reset the password protecting local (iTunes) backups. This in turn makes logical acquisition easily possible. Since iOS 13, the Screen Time password is not extractable from local backups, even if they are encrypted with a known password. For this reason, cloud extraction is the only way of obtaining Screen Time passwords from devices running iOS 13.

Screen Time information in iCloud is securely encrypted. Apple used the same protection mechanisms as it did for protecting the iCloud Keychain. The data is encrypted with an encryption key that can be decrypted by entering a screen lock passcode of the enrolled device. This means that, in order to access Screen Time data, you will need all of the following: the user’s Apple ID credentials (login, password and 2FA code) and their screen lock password.

Extracting the Screen Time Password with Elcomsoft Phone Breaker

In order to extract the Screen Time password from iCloud, you will need Elcomsoft Phone Breaker 9.20 or newer. At the time of this writing, Elcomsoft Phone Breaker is the only tool on the market that can obtain Screen Time passwords from the cloud (as opposed to extracting them from local backups).

In order to have Screen Time passcodes synchronized with the user’s account, the “Share across devices” setting must be already enabled on the device. If it’s not, the Screen Time passcode remains local and cannot be extracted from the cloud. The “Share across devices” feature requires 2FA, so passing two-factor authentication will be mandatory.

Important: if the Screen Time password is configured and is unknown, but the “Share across devices” setting is not already enabled on the device, the Screen Time password will not sync to iCloud. If you attempt to enable “Share across devices” yourself, you will be prompted for the Screen Time password, which is a deadlock. As a result, you will be only able to extract Screen Time passcodes from iCloud if the “Share across devices” setting is already enabled.

  1. Launch Elcomsoft Phone Breaker
  2. Select “Synced data”
  3. Sign in to the user’s Apple account (login/password/2FA only)
  4. On the screen that follows, select the “Screen Time” check box
  5. Phone Breaker will display the list of enrolled devices. You will be prompted for device screen lock passcode. Select a device from the list and enter its passcode (or system password if it’s a Mac) to continue
  6. Download the data
  7. Launch Elcomsoft Phone Viewer and open the data you have just downloaded
  8. The Screen Time passcode will be displayed on the main screen of Elcomsoft Phone Viewer

Additional information is available in Elcomsoft Phone Viewer if you open the “Screen Time” tab.

The following Screen Time data is extracted: the Screen Time password (both parents’ and children’s, if any child accounts are present); information about all devices sharing Screen Time data through iCloud, including the list of installed applications on these devices (including Mac computers and Apple Watch). In addition, the tool extracts information about configured restrictions. You can view all of that data in Elcomsoft Phone Viewer.

The Next Step

If the purpose of obtaining the Screen Time passcode was resetting the local backup password, you can now open the Settings app and tap Reset All Settings. You will be consecutively prompted for the device screen lock passcode and Screen Time passcode. After resetting the local backup password, make sure to specify your own password (via iTunes or by using Elcomsoft iOS Forensic Toolkit that automatically sets the password of “123”). If using iOS 13, you will need to confirm the change by entering the device screen lock password (on the device) when prompted. You must specify a known local backup password to decrypt the Keychain and Health data. In iOS 13, you will only have access to Safari browsing history and some other data (such as calllogs) in local backups that are password-protected.

Extracting Voice Memos from iCloud

Voice Memos is a native app made by Apple and available in the App Store. The app makes it possible to record audio clips using the iPhone’s built-in microphone. In iOS 12, Voice Memos became a fully-featured audio recording and editing app. Voice Memos is frequently used to record lectures and presentations, interviews and auditions. iOS 12 and 13 as well as macOS 10.15 Catalina can synchronize the recorded audio clips to iCloud.

Elcomsoft Phone Breaker can download Voice Memos clips from iCloud synced data. This is how to do that.

  1. Launch Elcomsoft Phone Breaker
  2. Select “Synchronized data”
  3. Sign in to the user’s Apple account (login/password/2FA or token)
  4. On the screen that follows, select the “Voice Memos” check box
  5. Download the data

You can now analyze Voice Memos with Elcomsoft Phone Viewer.

Installing and using iOS Forensic Toolkit on macOS 10.15 Catalina

$
0
0

The release of macOS Catalina brought the usual bunch of security updates. One of those new security features directly affects how you install Elcomsoft iOS Forensic Toolkit on Macs running the new OS. In this guide we’ll provide step by step instructions on installing and running iOS Forensic Toolkit on computers running macOS 10.15 Catalina. Note: on macOS Catalina, you must use iOS Forensic Toolkit 5.11 or newer (older versions may also work but not recommended).

The Issue

In macOS 10.15, Apple made running third-party apps slightly more difficult. The new security measure is designed to prevent users from accidentally running apps downloaded from the Internet by quarantining files obtained from sources that aren’t explicitly whitelisted by Apple.

As Elcomsoft iOS Forensic Toolkit is not distributed through Apple App Store, our tool falls under this restriction and will be quarantined once you install it.

The Solution

Technically speaking, the system sets the quarantine flag when an agent (such as the Web browser, email client or another app) saves a file to the computer. When you first try to open an app you’ve downloaded from the internet, the OS will display a warning message and prevent you from launching the app.

In order to launch Elcomsoft iOS Forensic Toolkit, you’ll have to remove the quarantine flag by running the following command through the system’s terminal.

xattr -r -d com.apple.quarantine <path_to_dmg>

In order to install EIFT on a Mac running macOS Catalina, follow the instructions in the next chapter.

How to Install and Run iOS Forensic Toolkit on a Mac

Follow these steps to install iOS Forensic Toolkit:

  1. Download Elcomsoft iOS Forensic Toolkit via the link you received in your purchase confirmation email (make sure to select the Mac version)
  2. Unpack the archive. The current version will be unpacked as iOS-Toolkit-5.11-Mac.dmg
  3. Before mounting the DMG, run the following command in the system console:
    xattr -r -d com.apple.quarantine <path_to_dmg>

    For example, if you saved the DMG on your desktop, use this command:

    xattr -r -d com.apple.quarantine Desktop/iOS-Toolkit-5.11-Mac.dmg
  4. Mount the DMG file. IMPORTANT: do NOT launch EIFT directly from the mounted image! You MUST create a new directory on your Mac (e.g. on your Desktop) and copy the entire content of the mounted disk to that new folder. You can unmount and delete the DMG afterwards.
  5. Run the “Toolkit.command” from the newly created folder.

Using iOS Forensic Toolkit on macOS Catalina

There are several changes in macOS 10.15 making many forensic tools incompatible with the new OS. iOS Forensic Toolkit fully supports macOS Catalina from version 5.11 onwards.

Establishing trust

As you may know, macOS Catalina ditches the iTunes app. As a result, establishing trust with the iPhone you connect to your Mac now looks as follows:

Logical acquisition

This is how you extract a backup from the iPhone:

The detailed coverage of all iOS Forensic Toolkit features, issues and limitations is available in the product manual.

Running Windows?

We have recently covered some EIFT issues for Windows platform, see iOS Acquisition on Windows: Tips&Tricks for more details.


iOS Device Acquisition with checkra1n Jailbreak

$
0
0

We’ve just announced a major update to iOS Forensic Toolkit, now supporting the full range of devices that can be exploited with the unpatchable checkra1n jailbreak.  Why is the checkra1n jailbreak so important for the forensic community, and what new opportunities in acquiring Apple devices does it present to forensic experts? We’ll find out what types of data are available on both AFU (after first unlock) and BFU (before first unlock) devices, discuss the possibilities of acquiring locked iPhones, and provide instructions on installing the checkra1n jailbreak.

checkra1n is not about just the iPhones. We have recently tested checkra1n with Apple TV 4. Today is the day to try the new jailbreak with Apple’s bread-and-butter product, the iPhone. This is not just about supporting the new jailbreak; we’ll try to provide as much useful (and usable) information to LE practitioners as we can about the new exploit, why it cannot be patched by Apple and what the implications are for the future.

Why jailbreak?

We are always asked this question, and I feel it’s worth a good answer. In many cases, jailbreaking is the only gate to all (or most) information available in iOS and tvOS devices. Logical acquisition is a safe and easy way; it always works, and there is nothing to lose. However, logical mostly gives you the same data you can get via the iTunes app: an iTunes-style backup (that may or may not be encrypted), media files and some logs. There’s much more data stored in the iPhone than that, but it does not mean you should skimp on logical. We advise to always do logical first, followed by file system extraction. There’s also the cloud, which you can do at any time.

How checkra1n is different

Jailbreaks always had limited compatibility. Jailbreak releases always lagged behind Apple’s releases, making it possible to jailbreak previous versions of iOS but almost never the current build. The new checkra1n jailbreak supports a wide list of devices and versions of iOS, including many versions of iOS 13. This is also the first jailbreak since the iPhone 4 that can be installed on a “cold” device with an unknown password and then used to extract some data.

Unlike classic jailbreaks such as Chimera or unc0ver, this one is based on a bootrom vulnerability and exploit. checkra1n is potentially compatible with all versions of iOS provided that they run on supported hardware. More importantly, it will remain compatible with new and upcoming iOS releases as the bootrom vulnerability cannot be patched by Apple.

The list of supported devices includes the iPhone 5s, iPhone 6, iPhone SE, iPhone 6s, iPhone 7 and 7 Plus, iPhone 8, 8 Plus and iPhone X, as well as most iPads based on similar SoC. Apple TV HD (ATV4) and Apple TV 4K as well as potentially Apple Watch series 1, 2 and 3 are also in the list.

Supported versions of iOS officially include iOS 12.3 and up, all the way to the current build of iOS 13. Older versions should be supported as well, but have not been tested.

The last time we saw a bootrom exploit of this scale was back in 2010 for the iPhone 4. The limera1n exploit allowed us to be the first who performed a full physical acquisition (true physical, i.e. bit-precise copy of the iPhone storage, passcode cracking, plus the extraction of most of the data without a passcode).

How to install checkra1n

checkra1n is a big departure from the tried and true Cydia Impactor procedure. Which may not be a bad thing since Cydia Impactor has been broken for weeks. The initial version of checkra1n was available for macOS only. Today, there are Windows and Linux versions available. However, the macOS build remains the most reliable, and we still recommend you to use macOS to jailbreak and to perform acquisition, especially if you are doing mobile forensics on a regular basis. If you do not have a Mac yet, it may be a worthy addition to your arsenal. get If you are on a budget, any model that can run macOS Catalina (10.15) will do. While there is a limited set of mobile forensic tools available on the market (apart from our software, we can recommend BlackBag solutions), this is a good investment.

Method 1

Installing checkra1n is quite different from every other jailbreak of the last few years. There is no need to sign and sideload an IPA file to the device. All you have to do is start the checkra1n utility, connect the device (USB-A to Ligning cable is recommended; some sources say that USB-C to Ligtning does not work well) and follow the instructions. The device should be in Normal mode (unless it is locked and the passcode is not known), and the utility first puts it into Recovery mode (automatically), then you have to manually put it into the DFU mode. Honestly, it’s always a pain and just never works from the first try; in the end, with some trial and error, it does. Instructions for various models available here:

Once checkra1n recognizes the device in DFU mode, in installs the jailbreak (it takes just a couple of minutes) and reboots the iPhone. You can now start using iOS Forensic Toolkit.

Method 2 (recommended)

There is an alternative way to install it, and may I say it’s the better way. Even with some (minor) risks involved, we recommend that alternative method instead of the method described above for two reasons:

  • No need to enter into Recovery mode first.
  • It can be done even for locked devices with unknown passcode.

No GUI time. Just switch the to DFU mode, open the Terminal and run the following commands (note the trailing dash as a parameter in the second command):

cd /checkra1n.app/Contents/MacOS/
./checkra1n_gui -

That’s it, the device is now jailbroken.

Acquisition

Once the jailbreak is installed, start iOS Forensic Toolkit. You can now perform the file system acquisition, exactly the same way you do it with all other jailbreaks. Important: when prompted for the port number, enter 44 instead of the standard 22. The new port number is basically the only difference except for the root password routine. While the root password is still ‘alpine’, the new version of EIFT spares you from the effort of typing it by filling it in automatically. (If the root password was changed, you can still type it manually).

Important: the port number is 44.

There is another important point: if the screen lock passcode is unknown, options D (Disable lock) and K (Keychain) will not be available (throw an error), and only F (File system) works. Besides, if you don’t know the screen lock passcode, only a very limited set of data will be available, see below. To obtain the complete file system (and the keychain), you need to unlock the device, and keep it unlocked during the acquisition.

That’s probably it. The acquisition itself is as simple as that; you will spend most of the time installing the jailbreak (of which getting the device into DFU takes the most effort) and analyzing the results.

With this new jailbreak, can you extract the file system without EIFT or similar software? Technically, you can obtain a copy of the file system. However, you won’t be able to decrypt the keychain. The keychain contains a lot of valuable information such as the user’s credentials for different services ranging from Web sites to social networks and mail accounts, as well as encryption keys for Signal messenger, WhatsApp backups and more.

The results

First things first: this jailbreak cannot help with passcode recovery. As we already noted, some limited data can be obtained from locked devices. That’s by design: in iOS, all files may have different protection classes. While the most critical ones are protected with the “when unlocked” attribute (or at least the “after first unlock”), some are available before unlocking. This is necessary for the system to boot, to receive incoming calls (even when the device is just rebooted), process “Find My” requests and more. It does not create a serious security risk as the device itself still remains locked. With the new jailbreak, all such files are accessible prior to unlocking. Just to name some:

Logs, preferences, profiles

  • /private/var/installd/Library/Logs/MobileInstallation/
  • /private/var/log/
  • /private/var/preferences/
  • /private/var/root/Library/Preferences/
  • /private/var/mobile/Library/Logs/
  • /private/var/mobile/Library/Preferences/
  • /private/var/mobile/Library/UserConfigurationProfiles/

System databases

  • /private/var/wireless/Library/Databases/CellularUsage.db
  • /private/var/wireless/Library/Databases/DataUsage.db
  • /private/var/root/Library/Caches/locationd/consolidated.db
  • /private/var/mobile/Media/Downloads/downloads.28.sqlitedb
  • /private/var/mobile/Library/ApplePushService/aps.db
  • /private/var/mobile/Library/FrontBoard/applicationState.db
  • /private/var/mobile/Library/TCC/TCC.db

Call log and iMessage/SMS (temporary databases)

  • /private/var/mobile/Library/CallHistoryDB/CallHistoryTemp.storedata
  • /private/var/mobile/Library/SMS/sms-temp.db

Voice mail

  • /private/var/mobile/Library/Voicemail/voicemail.db

Have I mentioned the list of accounts (/private/var/mobile/Library/Accounts/Accounts3.sqlite)? No passwords there, yet you can access some information about the device owner and all related accounts used on this device.

You will also get a history of Wi-Fi connections, paired Bluetooth devices, write-ahead logs (WAL) for SQLite databases, WhatsApp *.log files, the list of blocked contacts and dozens various plists; the complete list of non-encrypted files is yet to explore and analyse.

The best results, however, can be achieved only if the device is unlocked (the screen lock passcode is not set or is known). Do not overlook the keychain decryption; you will gain access to tons of passwords and authentication tokens, opening the door for cloud acquisition with Elcomsoft Phone Breaker for Apple iCloud and Elcomsoft Cloud eXplorer for Google accounts.

If you need to analyse a file system image (.tar file), try Elcomsoft Phone Viewer or some of the more advanced forensic packages such as Oxygen Forensic Detective or BlackBag BlackLight (guys, you still need to do a better job analyzing “BFU files”); we cannot trust other tools due to several reasons that are outside the scope of this article.

One more thing

We recently shared some tips on using the iOS Forensic Toolkit on Windows and macOS:

We strongly recommend reading these two articles in order to understand and avoid potential issues (such as the computer connecting to the wrong iOS device). Most importantly (not just for this jailbreak, but in general): before acquisition, disable all Wi-Fi and Ethernet (!) connections on the computer where EIFT is running, and put the iOS device into airplane mode. I cannot stress this enough; if you fail to do this simple thing on BOTH the computer AND the iOS device, all kinds of weird issues may (and probably will) happen.

There is one minor issue with keychain extraction occurring in the Windows edition only. It’s related to the improved SSH connection in the new version (without the need to enter the root password). You will get the following prompt (after selecting the iOS version):

Please select the following action:
1. Forcefully dump keychain without unlocking
2. Wait until device is unlocked and dump keychain after that

In the first case, the Toolkit tries to dump the keychain “as is”, in the current state of the device; only a very limited number of records will be dumped. With the second option, the Toolkit sends a command to unlock the keychain (to receive all the data), and the iPhone shows a prompt to enter the passcode. In that case, you will see Executing… message after unlocking, followed by Press ‘Enter’ to continue once the process is done. The number of extracted records from the particular keychain categories is not printed to console as in the macOS version, but don’t you worry, everything is there.

A word on USB restricted mode and pairing

If you are familiar with USB restricted mode, you may ask whether it affects the ability to jailbreak with checkra1n and acquire with iOS Forensic Toolkit.

The answer is yes, it does. In DFU mode, the device is still accessible even if DFU restricted mode has been activated; checkra1n can be installed and no passcode is needed. Once the jailbreak is installed, partial (BFU) acquisition is possible, and it is worth going after. However, you will still need the screen lock passcode in order to unlock the device and extract the full file system and the keychain.

What about the pairing (lockdown) records? Is it possible to acquire if the device is not paired?

Yes and no. If you work with a device with an unknown passcode, and cannot establish a trusted relationship with the computer, then file system acquisition still works in limited mode. Keychain extraction does not work. We cannot even upload the keychain decryption utility to the device; in order to decrypt the keychain, the device must be unlocked. If the device is unlocked (the passcode is known or not set), you will have to establish a trusted relationship in order to extract and decrypt the keychain.

Acknowledgements

First, many thanks to @axi0mX, the genius researcher who discovered the bootrom vulnerability and created checkm8 exploit. That’s a real breakthrough!

Authors of checkra1n did an excellent job, too! The list of everyone involved in this project is available on their web page. Thanks guys, really appreciated, keep up your good work!

And last but not least, big thanks to Mattia Epifani, a SANS FOR 585 instructor, co-author of Learning iOS Forensics and our good friend. Check his twitter account for up to date information on this topic! Mattia, this work would not be possible without your research, your support and your ideas.

Extracting Skype Histories and Deleted Files Metadata from Microsoft Account

$
0
0

Skype synchronizes chats, text messages and files sent and received with the Microsoft Account backend. Accessing Skype conversation histories by performing a forensic analysis of the user’s Microsoft Account is often the fastest and easiest way to obtain valuable evidence. Learn how to use Elcomsoft Phone Breaker to quickly extract the complete conversation histories along with attachments and metadata from the user’s Microsoft Account.

What’s It All About?

With over 1.55 billion accounts and more than 420 million daily users, Skype is one of the world’s biggest instant messaging apps. While there is no lack of competition in the highly crowded market of instant messaging apps, Skype maintains its user base. This feature-rich app is available for all relevant platforms, and is actively developed and frequently updated by Microsoft. Skype is secure (enough) while maintaining transparency to the law enforcement, which makes Skype the only allowed VoIP communication app in countries such as the UAE. The free Skype-to-phone calls included with all Microsoft Office 365 subscriptions help Skype gain popularity among corporate and small office users, while integration with Alexa and Cortana voice assistants makes Skype the tool of choice for voice calls.

Skype conversations are automatically synced with the back end along with attachments. While text chats are stored on Microsoft servers indefinitely or until manually deleted by the user, attachments are only kept for the maximum period of 30 days. After the 30-day retention period, any files users send or received are automatically purged from the server and are no longer accessible. However, Microsoft still retains information about these files (the metadata), allowing experts to find out the name and type of attachments, file sizes, as well as the date and time.

Having said that, one can use Microsoft’s own tool to request and view Skype data from the account. However, information returned by the Microsoft’s tool lacks certain data about the chats and files that have been either deleted by the user or purged from Microsoft servers as a space-saving measure. This is why we developed the tools to extract and view all Skype-related information available in the user’s Microsoft Account.

Tools to Extract Skype Chats, Attachments and Metadata from Microsoft Account

We have exactly two tools to be used in connection with Skype data. First, there is Elcomsoft Phone Breaker, a tool to download Skype conversation histories from Microsoft servers. You would then use Elcomsoft Phone Viewer to browse through and analyze the downloaded data.

Available information

We download Skype conversation histories, messages, media files, contact lists and metadata directly from the user’s Microsoft Account.

What is required to download Slype data?

In order to access this information, full authentication credentials are required including the user’s Microsoft ID (typically, their Hotmail.com, Live.com or Outlook.com email address), password, and the second authentication factor if two-factor authentication is enabled.

Skype metadata

In addition to existing data, Elcomsoft Phone Breaker can extract so-called Skype metadata. Skype metadata gives experts insight about stuff that is no longer stored on Microsoft servers. Users can delete chats and conversations, and they will be gone from the server. Files sent and received in Skype are automatically purged from Microsoft servers after the 30-day retention period. Traces left behind these deleted chats and purged files are called metadata. Skype metadata includes information such as the date and time, size, file name, sender, and chat name.

The How-To Guide on Extracting Skype Data

In order to download Skype data, you’ll need Elcomsoft Phone Breaker 9.40 or newer.

  1. Launch Elcomsoft Phone Breaker and select Tools | Microsoft.
  2. In the “Download data from the Microsoft Account” dialog, enter the user name (Microsoft Account) and password of the user whose Skype data you are about to obtain.
  3. If the account is protected with two-step verification, you will be offered the choice of the second authentication method. In our example, we opted to receive the one-time authentication code via a text message (SMS). Click “Send code” to request a code. The one-time code will be sent to the trusted phone number registered on the user’s account.
  4. After passing the two-factor authentication prompt, select the “Skype” check box.
  5. The data will be downloaded from the Microsoft Account. Depending on the speed of your Internet connection and the amount of data in the user’s account, the download time can range from several seconds to several minutes (more if there are many chats and/or large attachments).
  6. Once download is finished, you will have the ability to open the data in Elcomsoft Phone Viewer by clicking the “Open in EPV” link.

In order to view the data you have just downloaded, use Elcomsoft Phone Viewer 4.20 or newer.

  1. Use the “Open in EPV” link to launch Elcomsoft Phone Viewer.
  2. The user’s Skype conversation history will be opened.
  3. You can also access attachments. For attachments older than 30 days, you will still have access to file metadata, although the actual files will not be available for download.


BFU Extraction: Forensic Analysis of Locked and Disabled iPhones

$
0
0

We have recently updated Elcomsoft iOS Forensic Toolkit, adding the ability to acquire the file system from a wide range of iOS devices. The supported devices include models ranging from the iPhone 5s through the iPhone X regardless of the iOS version; more on that in iOS Device Acquisition with checkra1n Jailbreak. In today’s update (for both Windows and macOS platforms as usual), we’ve added the ability to extract select keychain records in the BFU (Before First Unlock) mode. We have a few other changes and some tips on extracting locked and disabled devices.

BFU Forensics

The BFU stands for “Before First Unlock”. BFU devices are those that have been powered off or rebooted and have never been subsequently unlocked, not even once, by entering the correct screen lock passcode.

In Apple’s world, the content of the iPhone remains securely encrypted until the moment the user taps in their screen lock passcode. The screen lock passcode is absolutely required to generate the encryption key, which in turn is absolutely required to decrypt the iPhone’s file system. In other words, almost everything inside the iPhone remains encrypted until the user unlocks it with their passcode after the phone starts up.

It is the “almost” part of the “everything” that we target in this update. We’ve discovered that certain bits and pieces are available in iOS devices even before the first unlock. In particular, some keychain items containing authentication credentials for email accounts and a number of authentication tokens are available before first unlock. This is by design; these bits and pieces are needed to allow the iPhone to start up correctly before the user punches in the passcode.

Imaging Locked and Disabled Devices

First, the disclosure. We cannot and will not help unlocking iOS devices. We are offering other possibilities not requiring the unlocking. It is often possible to perform the full logical acquisition, extracting the backup, media files and logs, with the help of lockdown/pairing records. The more interesting option is available for select Apple devices that have a bootrom vulnerability exploited by the developers of the checkra1n jailbreak. For these devices (iPhone models ranging from the iPhone 5s through the iPhone X) we can perform a partial file system extraction even if the screen lock passcode is not known.

With  Elcomsoft iOS Forensic Toolkit, you can now extract the keychain as well. Yes, in BFU mode, even if the device is locked or disabled (“Connect to iTunes”). While this is only a partial keychain extraction, as most keychain records are encrypted using the key derived from the user’s passcode, this is much better than nothing – and coming from a locked device!

What about disabled devices, when an incorrect passcode has been entered 10 times in a row, and the device prompts you to connect to iTunes (where you can only completely reset the device)? Unless the Erase data option is enabled, the data is still there; it’s just not available for extraction via regular means. BFU acquisition still works even in this case, and you can even extract parts of the keychain.

BFU Keychain Extraction

The ([K]eychain) option now works even in the BFU (Before First Unlock) mode. In the AFU (After First Unlock) mode, you had to enter the device passcode in order to unlock the keychain. As the passcode is not known (otherwise you would perform AFU acquisition instead), simply skip this step by pressing Enter:

Only records with kSecAttrAccessibleAlways and kSecAttributeAccessibleAlwaysThisDeviceOnly attributes will be extracted (for more information on keychain protection classes and what particular records are available in BFU mode, see Keychain data class protections in Apple Platform Security (Fall 2019). There can be a lot of those, as you can see in the screen shot. Of course, there would be a lot more records available in the AFU mode (including all passwords saved on the device, authentication tokens, decryption keys for secure messengers such as Signal and WhatsApp, etc.):

The keychain is saved as a keychain_UDID_timestamp.xml (where the UDID is the unique ID of the device, and the timestamp is the date and time of the extraction).

What can you extract, exactly, from locked and disabled devices? You can analyse the extracted keychain manually (as it is in the XML format), but we suggest using Elcomsoft Phone Breaker to explore the keychain (just make sure to rename the file to keychaindump.xml first):

Interestingly, when analyzing my own device, I discovered passwords to mail.ru and rambler.ru accounts, the two popular mail services in Russia. The location was a bit unusual:

I have no idea where they come from, probably leaked from some insecure apps.

Anything else? Some keychain records contain account names (typically email addresses), as well as the user’s Skype account ID.

DFU and USB Restricted Mode

Not to be confused with BFU (Before First Unlock), the DFU mode stands for “Device Firmware Upgrade”. The checkra1n jailbreak utilizes the DFU mode for installation. When I performed the initial tests jailbreaking an iOS 13.3 device, I discovered that the device enters the USB restricted mode on reboot after installing the checkra1n. Our initial reaction was to blame (or praise) Apple for attempting to patch the jailbreak. I was wrong; the problem was in the jailbreak itself. The last two versions (0.9.7 and 0.9.6) are the ones affected. Instead, use a specific version of checkra1n 0.9.5 (https://checkra.in/releases/); it works just as well even with devices where the USB restricted mode is already activated. The only problem is that 0.9.5 does not support certain devices.

For more information on USB restricted mode, see Activating data connections securely in the same Apple Platform Security (Fall 2019) mentioned above (direct link to full PDF document):

To improve security while maintaining usability Touch ID, Face ID, or passcode entry is required to activate data connections via the Lightning, USB, or Smart Connector interface if no data connection has been established recently. This limits the attack surface against physically connected devices such as malicious chargers while still enabling usage of other accessories within reasonable time constraints. If more than an hour has passed since the iOS or iPadOS device has locked or since an accessoryʼs data connection has been terminated, the device wonʼt allow any new data connections to be established until the device is unlocked. During this hour period, only data connections from accessories that have been previously connected to the device while in an unlocked state will be allowed. These accessories are remembered for 30 days after the last time they were connected. Attempts by an unknown accessory to open a data connection during this period will disable all accessory data connections over Lighting, USB, and Smart Connector until the device is unlocked again. This hour period:

  • Ensures that frequent users of connections to a Mac or PC, to accessories, or wired to CarPlay wonʼt need to input their passcodes every time they attach their device.
  • Is necessary because the accessory ecosystem doesnʼt provide a cryptographically reliable way to identify accessories before establishing a data connection.

In addition, if itʼs been more than three days since a data connection has been established with an accessory, the device will disallow new data connections immediately after it locks. This is to increase protection for users that donʼt often make use of such accessories. Data connections over Lightning, USB, and Smart Connector are also disabled whenever the device is in a state where it requires a passcode to reenable biometric authentication.

The user can choose to reenable always-on data connections in Settings (setting up some assistive devices does this automatically).

The Analysis

Elcomsoft Phone Breaker can be used to analyse the contents of the keychain, but what about the full system image? The file system is acquired with the UDID_timestamp.tar name (instead of user.tar in older versions of iOS Forensic Toolkit). We recommend using Elcomsoft Phone Viewer (Forensic edition), a very simple and lightning fast tool that displays a number of data categories:

In the BFU mode (unknown device passcode), you can get the list of installed applications, some Wallet data (that was a surprise, I have no idea why they are not encrypted), the list of Wi-Fi connections, a lot of media files, notifications (these may contain some chat messages and other useful data). There are also a lot of location points.

Alternatively, you can use third-party forensic software. We evaluated most tools available on the market, and can recommend Oxygen Forensic Detective, which we find to be the best in its class. Oxygen makes a fast, convenient and full-featured toolkit (and analyses a lot of system data well hidden in the system); way better than the dramatically expensive and slow Cellebrite UFED Physical Analyzer that used to be the leader in the past. In our experience, Oxygen delivers the most comprehensive analysis of the complete TAR images captured by iOS Forensic Toolkit, including the knowledgeC.db database everyone is raving about. Oxygens were quick to support BFU dumps as well, processing files such as /private/var/wireless/Library/Databases/DataUsage.sqlite (apps’ network activities), /private/var/preferences/ (network interfaces) or /private/var/mobile/Library/Voicemail/ (voicemail messages). While many forensic tools analyze those files, it was Oxygen Forensic Detective that returned the largest true number of artifacts.

Yes, all this data is from BFU extraction. Pay attention to the “Image Categorization” – this the new built-in feature introduced in latest Oxygen Forensic Detective, that allows to detect, analyze, and categorize images from twelve different categories, such as weapon, drugs, child abuse, extremism and more.

Finally, you can  unpack the .tar archive and analyse the data manually; please refer to Analyzing extractions “Before First Unlock” for additional information, locations of interesting data available in BFU state and more analysis tips.

BFU extraction of the file system provides only a limited set of data. For example, my favorite test device (iPhone X running iOS 12.4) is packed with about 150 GB of data. The BFU acquisition of that device can only access 45 GB of that data.

More Information

We have additional information in The Art of iPhone Acquisition. Shall you need hands-on experience, we are offering a range of trainings on both mobile and desktop forensics.

Future Work

We will continue working on integrating the checkra1n jailbreak and the underlying checkm8 exploit with our tool. iOS acquisition through jailbreaking is often the only method to get the data, but at this point it’s not nearly forensically sound as it alters the content of the file system. Many things installed by the jailbreak are not needed for the extraction. In addition, jailbreaking is still a bit risky. However, we are working on integrating the low-level checkm8 exploit into our software. This should straighten up the process, making it faster, simpler, safer and completely forensically sound.

Our Developments and Achievements in 2019

$
0
0

For us, this year has been extremely replete with all sorts of developments in desktop, mobile and cloud forensics. We are proud with our achievements and want to share with you. Let’s have a quick look at what we’ve achieved in the year 2019.

Mobile Forensics: iOS File System Imaging

We started this year by updating Elcomsoft iOS Forensic Toolkit, and by a twist of a fate it became our most developed tool in 2019. The developments went through a number of iterations. The release of unc0ver and Electra jailbreaks enabled Elcomsoft iOS Forensic Toolkit to support physical acquisition for iOS 11.4 and 11.4.1 devices, allowing it to produce file system extraction via jailbreak.

In the meanwhile, we updated Elcomsoft Phone Viewer with support for file system images produced by GrayKey, a popular forensic solution for iOS physical extraction. Analysing GrayKey output with Elcomsoft Phone Viewer became faster and more convenient.

Later in February, Elcomsoft iOS Forensic Toolkit received a major update, adding support for physical acquisition of Apple devices running iOS 12. The tool became capable of extracting the content of the file system and decrypting passwords and authentication credentials stored in the iOS keychain. For the first time, iOS Forensic Toolkit made use of a rootless jailbreak with significantly smaller footprint compared to traditional jailbreaks.

Not long ago, Elcomsoft iOS Forensic Toolkit 5.20 was updated with file system extraction support for select Apple devices running all versions of iOS from iOS 12 to iOS 13.3. Making use of the new future-proof bootrom exploit built into the checkra1n jailbreak, EIFT is able to extract the full file system image, decrypt passwords and authentication credentials stored in the iOS keychain. And finally, the sensational version 5.21 raised a storm of headlines talking about iOS Forensic Toolkit as the ‘New Apple iOS 13.3 Security Threat’. Why? We made the tool support the extraction of iOS keychain from locked and disabled devices in the BPU-mode (Before-first-unlock). The extraction is available on Apple devices built with A7 through A11 generation SoC via the checkra1n jailbreak.

Mobile Forensics: Logical Acquisition

Later on, Elcomsoft Phone Viewer was further updated to recover and display Restrictions and Screen Time passwords when analysing iOS local backups. In addition, version 4.60 became capable of decrypting and displaying conversation histories in Signal, one of the world’s most secure messaging apps. Experts became able to decrypt and analyse Signal communication histories when analysing the results of iOS file system acquisition.

Desktop Forensics and Trainings

In 2019 we’ve also updated Advanced PDF Password Recovery with a new Device Manager, and added support for NVIDIA CUDA 10 and OpenCL graphic cards to Advanced Office Password Recovery. Advanced Intuit Password Recovery added support for Quicken and QuickBooks 2018-2019 covering the changes in data formats and encryption of newest Intuit applications. In addition, the tool enabled GPU acceleration on the latest generation of NVIDIA boards via CUDA 10.

We are proud to say that the many changes we implemented in Elcomsoft Distributed Password Recovery are based on the users’ feedback we received by email and in person, during and after the training sessions. We had several trainings this year in the UK, Northern Ireland and Canada. “Fantastic. Time well spent on the training and on software that will be very useful on cases in the future”, commented Computer Forensic Examiner.

Cloud Forensics

We learned how to extract and decrypt Apple Health data from the cloud – something that Apple won’t provide to the law enforcement when serving legal requests. Health data can serve as essential evidence during investigations. The updated Elcomsoft Phone Viewer can show Apple Health data extracted with Elcomsoft Phone Breaker or available in iOS local backups and file system images.

Very soon Elcomsoft Phone Breaker 9.20 expanded the list of supported data categories, adding iOS Screen Time and Voice Memos. Screen Time passwords and some additional information can be extracted from iCloud along with other synchronized data, while Voice Memos can be extracted from local and cloud backups and iCloud synchronized data.

Skype anyone? In December, Elcomsoft Phone Viewer and Elcomsoft Phone Breaker were updated to extract and display Skype conversation histories.

Desktop Forensics: Disk Encryption

Elcomsoft System Recovery received a major update with enhanced full-disk encryption support. The update made it easy to process full-disk encryption by simply booting from a flash drive. The tool automatically detects full-disk encryption, extracting and saving information required to brute-force passwords to encrypted volumes. In addition, the tool became capable of saving the system’s hibernation file to the flash drive for subsequent extraction of decryption keys for accessing encrypted volumes.

Cloud Forensics: iOS 13 & Authentication Tokens

Elcomsoft Phone Breaker 9.15 added the ability to download iCloud backups created with iPhone and iPad devices running iOS 13 and iPadOS. In addition, the tool became able to extract fully-featured iCloud authentication tokens from macOS computers.

Following this, Elcomsoft Phone Breaker 9.30 delivered a new iCloud downloading engine and low-level access to iCloud Drive data. Thanks to the new iCloud engine, the tool became capable of downloading backups produced by devices running all versions of iOS up to iOS 13.2. While advanced iCloud Drive structure analysis allows users to enable deep, low-level analysis of iCloud Drive secure containers.

Cloud Forensics: Google

Elcomsoft Cloud Explorer 2.20 boosted the number of data types available for acquisition, allowing experts to additionally download a bunch of new types of data. This includes data sources in the Visited tree, Web pages opened on Android devices, requests to Google Assistant in Voice search, Google Lens in Search history, Google Play Books and Google Play Movies & TV.

Google Fit Extraction: Location, Health and Fitness Data

$
0
0

We have updated Elcomsoft Cloud Explorer, our Google Account extraction tool, with Google Fit support. Google Fit is a relatively little known Google service aimed at tracking the user’s health and physical activities. In line with pretty much every other Google service, Google Fit synchronizes massive amounts of data with the user’s Google Account, storing activity-related information collected by all of the user’s devices in a single place. When extracting these data, we discovered massive amounts of location points stored alongside with information related to the user’s physical activities. Learn what is stored in Google Fit and how to extract it from the cloud!

What’s it all about

Google Fit extraction is about the massive amounts of data related to the user’s health and physical activities stored in the Google’s cloud. The detailed, high-frequency location data collected by Google’s fitness app accompanied with information about the user’s physical condition can be truly invaluable during an investigation.

Google Fit is not the only type of information collected by Google. The search giant collects massive amounts of information. The types of data range from many years worth of the user’s location history to all of the user’s password saved in the Chrome browser or used with Android apps. Google Photos, Gmail, contacts and calendars, search requests and Web history, voice snippets, call logs and text messages and a lot more can make for some invaluable evidence. While Google readily returns most of that data when serving legal requests, Elcomsoft Cloud Explorer offers a much easier and near-instant extraction solution that requires far less paperwork. Considering the number of fully encrypted Android smartphones that may or may not be physically unlocked, Elcomsoft Cloud Explorer becomes truly irreplaceable, discovering more evidence than ever by revealing the hidden data one would never imagine existed, browsing deep inside into the user’s online activities going many years back. Elcomsoft Cloud Explorer does what Google itself does not do, offering a single point for downloading, discovering and analyzing evidence collected by Google.

How Google Fit collects information

Google Fit is both an app and a service. The Google Fit app is available for Android and iOS platforms; it can be used on both Android phones and Apple iPhones. The Google Fit service processes and stores information collected from all supported devices where it’s installed in the user’s Google Account.

While many users associate Google Fit with WearOS smartwatches, in reality the app does not require a smartwatch or a fitness tracker. A connected activity tracking device can provide information such as the number of steps walked, the number of stairs climbed, the user’s hear rate or periodic location points obtained from the tracker’s GPS sensor. When used without a compatible fitness tracker, the Google Fit app can source activity data from a smart combination of the phone’s built-in low-energy sensors, frequently obtained location points and a lot of artificial intelligence.

Google Fit data extracted from the user’s Google Account returns massive amounts of precise location points, allowing to pinpoint the user’s location with ultimate precision and granularity. Access to comprehensive location history and other critical real-time evidence can be vital for investigating crime.

Obtaining Google Account credentials

In order to sign in to the user’s Google Account, one requires the full set of Google credentials. The login and password can be often extracted from the user’s computer (with Elcomsoft Internet Password Breaker), from the cloud (with Elcomsoft Phone Breaker) or iOS keychain (with Elcomsoft iOS Forensic Toolkit).

In addition, some data from the Google Account (Google Fit being a notable exception) can be accessed with a token. The token is literally a cookie in Chrome, and can be extracted from the user’s computer. Elcomsoft Cloud Explorer includes a utility that automatically locates and extracts the authentication token from the Chrome browser installed on the user’s Mac or Windows PC. Using the extracted token, Elcomsoft Cloud Explorer authenticates into the user’s Google Account and displays the list of categories available for extraction.

Accessing Google Fit data

In order to extract Google Fit data from the user’s Google Account, you will need Elcomsoft Cloud Explorer 2.30 or newer.

  1. Launch Elcomsoft Cloud Explorer and create a new snapshot. Authenticate with the user’s login and password (Google Account). If required, pass two-factor authentication.
  2. Select the “Google Fit” check box.
  3. The data will be downloaded in several seconds to several minutes.
  4. After the processing, you can access Google Fit data from the main window.

Analyzing Google Fit data

You will be able to sort or group activities. The “Sessions” tab displays activity sessions detected by the Google Fit app. Activity sessions may include sleeping, walking, jogging and other types of activities.

Note that the sessions are detected automatically by the various apps and devices. Have a look at the “Package name” tab to discover which package has detected which session.

“Steps” can be either raw data from the connected smartwatch or fitness tracker, or information generated by the Google Fit app based on a combination of the smartphone’s step counter, the user’s height, and a lot of location data. If no external smartwatch or activity tracker is connected, the Google Fit app uses artificial intelligence to calculate the number of steps based on the abovementioned data. The app only polls the smartphone’s built-in step sensor at large intervals, relying more on location data than on the step counter.

Walking and running activities are automatically detected by the app based on the user’s heart rate, step count and location data.

One of the most interesting reports is “Locations”. By design, Google Fit collects massive amounts or location data. The test account reports 13,788 location points in 9 month. Considering that our test device was used on few rare occasions, the number of location reports is truly excessive. Clicking on a location point opens Google Maps.

Conclusion

Google Fit data may contain detailed information about the user’s location and physical conditions including the number of steps, types of activity, heart rate, elevation, and a lot more. Additional information provided by compatible health tracking devices may include blood pressure, elevation, precise step count, and additional location data collected from the GPS sensor built into the smartwatch or tracker. Analyzing the massive amounts of Google Fit data can become invaluable help when searching for evidence and investigating crime. The detailed, high-frequency location data collected by Google’s fitness app accompanied with information about the user’s physical condition can shed light on the user’s activities in a given timeframe.

Full File System Acquisition of iPhone 11 and Xr/Xs with iOS 13

$
0
0

The popular unc0ver jailbreak has been updated to v4, and this is quite a big deal. The newest update advertises support for the latest A12 and A13 devices running iOS 13 through 13.3. The current version of iOS is 13.3.1. None of the older versions (including iOS 13.3) are signed, but still there are a lot of A12/A12X/A13 devices floating around. Until now, file system and keychain extraction was a big problem. The newest unc0ver jailbreak makes it possible.

The new build is based on an exploit that is quite reliable by itself. However, jailbreaking is more than just a single exploit; a lot of things (that are outside the scope of this article) have to be done. So the new version of a jailbreak is not a silver bullet, and may still fail on many devices; we have tested a few and received mixed results. Still, if the given device can be jailbroken with unc0ver, it means that we can pull all the data from it, down to the last bit.

ICYMI: iPhones and iPads based on A12/A12X/A13 SoC are not vulnerable to checkm8 exploit, and there is no room for BFU acquisition (if the passcode is not known). That means that jailbreaking them using iOS (not bootrom) exploits is the only way to get all the data, at least for now.

Installing the jailbreak

The jailbreak (curren version: 4.0.2) is available as an IPA file (iOS/iPadOS package). There are several methods of installing it, but they usually require signing the IPA using a third-party certificate, which is not very safe and requires approving the certificate on the device, which in turn means that you have allow the device make an Internet connection. This in turn means that the device can be remotely locked or wiped (and even if Find My is disabled, it may sync and modify the data. The only workaround is to set up the network so that that it can only access the Apple’s servers that take care of certificate approval, but this is not not as easy as it sounds.

The better and safer way is to sign the jailbreak IPA with a developer’s certificate using Cydia Impactor. You will need a developer’s account to do that. If you have one, create an Application-specific password first as Cydia Impactor does not natively support 2FA.

Once the IPA is installed, just run it and press [Jailbreak]. That simple.

Well, not quite. First, you have to press [Settings] in the top-right corner and enable the following options:

  • Re(Install) OpenSSH
  • SSH Only
  • Read-Only SSH

What is it all about? Install OpenSSH (which is not installed by default); do not install Cydia (not only you won’t need it for the purpose of file system extraction, but removing Cydia after you’re done is a separate headache); do not remount the system partition, making the jailbreak rootless, safer, and with a minimum impact. I would not say “forensically sound”. But very close to that.

Note that the new build of unc0ver is not very reliable yet. If it fails, here is what the jailbreak developers recommend:

To everyone having reliability issues. You must follow those conditions carefully to have the best success:
– reboot
– airplane mode
– lock device
– wait 30 seconds (don’t do anything)
– jailbreak

A better exploitation method is required to avoid this. We’ll try our best.

Data acquisition

iOS Forensic Toolkit is all you need. First, do not miss some basic usage tips:

Ready to go? Extract the keychain and the file system first. Just note that with the keychain extraction, you may get error/warning messages like the following:

[+] memory_size: 3962028032
[-] no offsets for iPad8,1 17C54
[e] error reading kernel @0x0
[-] no kernel_call addresses for iPad8,1 17C54 [e] error reading kernel @0x0 Injecting to trust cache...
Actually injecting 1 keys
1 new hashes to inject
Successfully injected [1/1] to trust cache.
[e] error writing kernel @0x0

Just ignore them for now, we will take care on them later; they don’t seem to affect the keychain acquisition.

As for the file system, please note that if you forget to set the appropriate unc0ver options and install OpenSSH later from Cydia, acquisition will probably fail. The OpenSSH client installed alongside with the jailbreak works fine.

Anything else? Almost everything matters. Including whether you connect the iPhone directly or through a USB hub; the type of the cable (USB-A or USB-C to Lightning); and even the brand of the cable (original or not). Do not ask us why, ask Apple. To our experience, you get the best results when using an original Apple USB-A to Lightning cable connected directly (with no hubs); also, it works better on Macs. Yes, even that matters.

Data analysis

For “quick and dirty” analysis, use Elcomsoft Phone Viewer to browse the data acquired by iOS Forensic Toolkit. Do not underestimate this little tool; it does not parse all the data categories, but you will be surprised by the amount of data it can extract from media files (including deleted ones), locations, Apple Pay, Wallet etc. All the most-critical evidence is there.

Need more, including system databases, building the complete Timeline, defining social links between device contacts and extractions in Social Graph, getting comprehensive data analysis with facial recognition and image categorization, advanced data search and detailed reports? Get Oxygen Forensic Detective.

Did you extract the keychain? That’s a gold mine. Not just all the passwords and tokens (for dozens web sites, social networks, mail accounts and more), but also the encryption keys that will allow you to decrypt WhatsApp and Signal conversations. Use Elcomsoft Phone Breaker to browse it in a very convenient way (well, three ways); there you will be also able to export passwords to a wordlist, allowing you to break other files, documents and systems almost instantly.

iPhone Acquisition Without a Jailbreak (iOS 11 and 12)

$
0
0

Elcomsoft iOS Forensic Toolkit can perform full file system acquisition and decrypt the keychain from non-jailbroken iPhone and iPad devices. The caveat: the device must be running iOS 11 or 12 (except iOS 12.3, 12.3.1 and 12.4.1), and you must use an Apple ID registered in Apple’s Developer Program. In this article, I’ll explain the pros and contras of the new extraction method compared to traditional acquisition based on the jailbreak.

Why jailbreak?

Before I start talking about the new extraction method that does not require a jailbreak, let me cover the jailbreak first. In many cases, jailbreaking the device is the only way to obtain the file system and decrypt the keychain from iOS devices. Jailbreaking the device provides the required low-level access to the files and security keys inside the device, which is what we need to perform the extraction.

Jailbreaks have their negative points; lots of them in fact. Jailbreaking may be dangerous if not done properly. Jailbreaking the device can modify the file system (especially if you don’t pay close attention during the installation). A jailbreak installs lots of unnecessary stuff, which will be difficult to remove once you are done with extraction. Finally, jailbreaks are obtained from third-party sources; obtaining a jailbreak from the wrong source may expose the device to malware. For these and other reasons, jailbreaking may not be an option for some experts.

This is exactly what the new acquisition method is designed to overcome.

Agent-based extraction

The new extraction method is based on direct access to the file system, and does not require jailbreaking the device. Using agent-based extraction, you can can perform the full file system extraction and decrypt the keychain without the risks and footprint associated with third-party jailbreaks.

Agent-based extraction is new. In previous versions, iOS Forensic Toolkit offered the choice of advanced logical extraction (all devices) and full file system extraction with keychain decryption (jailbroken devices only). The second acquisition method required installing a jailbreak.

EIFT 5.30 introduced the third extraction method based on direct access to the file system. The new acquisition method utilizes an extraction agent we developed in-house. Once installed, the agent will talk to your computer, delivering significantly better speed and reliability compared to jailbreak-based extraction. In addition, agent-based extraction is completely safe as it neither modifies the system partition nor remounts the file system while performing automatic on-the-fly hashing of information being extracted. Agent-based extraction does not make any changes to user data, offering forensically sound extraction. Both the file system image and all keychain records are extracted and decrypted. Once you are done, you can remove the agent with a single command.

Compatibility of agent-based extraction

Jailbreak-free extraction is only available for a limited range of iOS devices. Supported devices range from the iPhone 5s all the way up to the iPhone Xr, Xs and Xs Max if they run any version of iOS from iOS 11 through iOS 12.4 (except iOS 12.3 and 12.3.1). Apple iPad devices running on the corresponding SoC are also supported. Here’s where agent-based extraction stands compared to other acquisition methods:

The differences between the four acquisition methods are as follows.

  1. Logical acquisition: works on all devices and versions of iOS and. Extracts backups, a few logs, can decrypt keychain items (not all of them). Extracts media files and app shared data.
  2. Extraction with a jailbreak: full file system extraction and keychain decryption. Only possible if a jailbreak is available for a given combination of iOS version and hardware.
  3. Extraction with checkra1n/checkm8: full file system extraction and keychain decryption. Utilizes a hardware exploit. Works on iOS 12.3-13.3.1. Compatibility is limited to A7..A11 devices (up to and including the iPhone X). Limited BFU extraction available if passcode unknown.
  4. Agent-based extraction: full file system extraction and keychain decryption. Does not require jailbreaking. Only possible for a limited range of iOS versions (iOS 11-12 except 12.3.1, 12.3.2, 12.4.1).

Prerequisites

Before you begin, you must have an Apple ID enrolled in Apple’s Developer Program in order to install the agent onto the iOS device being acquired. The Apple ID connected to that account must have two-factor authentication enabled. In addition, you will need to set up an Application-specific password in your Apple account, and use that app-specific password instead of the regular Apple ID password during the Agent installation.

Important: you can use your Developer Account for up to 100 devices of every type (e.g. 100 iPhones and 100 iPads). You can remove previously enrolled devices to make room for additional devices.

Using agent-based extraction

Once you have your Apple ID enrolled in Apple’s Developer Program, and have an app-specific password created, you can start with the agent.


  1. Connect the iOS device being acquired to your computer. Approve pairing request (you may have to enter the passcode on the device to do that).
  2. Launch Elcomsoft iOS Forensic Toolkit 5.30 or newer. The main menu will appear.
  3. We strongly recommend performing logical acquisition first (by creating the backup, extracting media files etc.)
  4. For agent-based extraction, you’ll be using numeric commands.
  5. Install the agent by using the ‘1’ (Install agent) command. You will have to enter your credentials (Apple ID and the app-specific password you’ve generated). Then type the ‘Team ID’ related to your developer account. Note that a non-developer Apple ID account is not sufficient to install the Agent. After the installation, start the Agent on the device and go back to the desktop to continue.
  6. Acquisition steps are similar to jailbreak-based acquisition, except that there is no need to use the ‘D’ (Disable lock) command. Leave the Agent (the iOS app) working in the foreground.
  7. Obtain the keychain by entering the ‘2’ command. A copy of the keychain will be saved.
  8. Extract the file system with the ‘3’ command. A file system image in the TAR format will be created.
  9. After you have finished the extraction, use the ‘4’ command to remove the agent from the device.

To analyse the file system image, use Elcomsoft Phone Viewer or an alternative forensic tool that supports .tar images. For analysing the keychain, use Elcomsoft Phone Breaker. For manual analysis, mount or unpack the image (we recommend using a UNIX or macOS system).

Conclusion

If you have unprocessed Apple devices with iOS 11 – 12.2 or 12.4, and if you cannot jailbreak for one or another reason, give the new extraction mode a try. iOS Forensic Toolkit 5.30 can pull the file system and decrypt the keychain, leaves no apparent traces, does not remount and does not modify the file system while offering safe, fast and reliable extraction.


Full file system and keychain extraction: now with iOS 13 and iPhone 11 support

$
0
0

We recently introduced a new acquisition method for iPhone and iPad devices. The fast, simple and safe extraction agent requires no jailbreak, and delivers the full file system image and the keychain. The latest release of Elcomsoft iOS Forensic Toolkit expanded this method to iOS 13 and filled the gaps in some versions of iOS 12 that were missing support (such as iOS 12.3 and 12.4.1). Finally, we now officially support the latest generation of iPhone devices including the iPhone 11, iPhone 11 and iPhone 11 Pro. The new compatibility matrix becomes significantly more diverse with this release, so bear with us to learn which iOS devices can be extracted without a jailbreak.

Compatibility

The extraction agent is supported on the following models and iOS versions:

  • iPhone 6s to iPhone X, iPad 5th and 6th gen, iPad Pro 1st and 2nd gen: iOS/iPadOS 11.0 – 13.3
  • iPhone Xr, Xs, Xs Max, iPad Mini 5, iPad Air 3rd gen, iPad Pro 3rd gen, iPod Touch 7th gen: iOS/iPadOS 12.0 – 13.3
  • iPhone 11, 11 Pro, 11 Pro Max: iOS 13.0 – 13.3

For some older models, compatibility remains unchanged. The following models are supported if running iOS 11-12.2 and iOS 12.4:

  • iPhone 5s, 6, 6 Plus
  • iPad Mini 2 and 3
  • iPad Air (1st gen)

There are two ‘iffy’ models: the iPad Mini 4 and iPad Air 2. While the agent-based extraction method will sure work on these models running iOS 11 through 12.2, we have not tested them with iOS 12.3, 12.4.1 or any version of iOS 13.

Requirements

Make sure that your device model and OS version are compatible, and register an Apple Developer account (here is why). Of course, you will need the latest version of iOS Forensic Toolkit, too. The software is really simple to use, but we still recommend to attend our trainings.

General advantages

The main advantage of this method is its wide compatibility with multiple iPhone and iPad models. In the future, we may add support for older iOS versions (to avoid all the troubles with jailbreaking, see below), and of course will do our best to add compatibility with newer versions (iOS 13.3.1 and up).

Next, the extraction agent is safe and reliable. Nothing wrong may happen; the worst is just a reboot of the device, or our method may simply not work on your device. See the Trobleshooting section below for some tips; sometimes it takes several tries (though usually it works from the first try).

Forensically sound? It depends on what you mean by that. Here is a good definition:

Digital evidence is said to be forensically sound if it was collected, analyzed, handled and stored in a manner that is acceptable by the law, and there is reasonable evidence to prove so. Forensic soundness gives reasonable assurance that digital evidence was not corrupted or destroyed during investigative processes whether on purpose or by accident.

(another good source: When is Digital Evidence Forensically Sound?)

For 64-bit iPhones (starting with the iPhone 5s), there is NO method of data acquisition that does not make ANY changes to the system, despite what other vendors say. Some traces are always left, like records in some system logs.

Next, the extraction speed. Instead of re-using ssh, we transfer the data directly over the USB. This method is more reliable and significantly faster; on modern iPhone models, the speed is about 2.5 GB/min.

Finally, the simplicity. No, it is still far from the proverbial “one button” solution, which simply does not exist in the area. Still, we did our best to make acquisition as simple and straightforward as possible, and we are still improving it. Just follow the software manual carefully, and make sure you read the articles published in our blog.

Last but not least. The agent extracts not only the full file system but also the complete keychain. While you can also extract the keychain from iTunes-style-backups, it won’t be complete as a lot of records cannot be decrypted. Use Elcomsoft Phone Breaker to view all the keychain records:

Advantages over jailbreaking

One can also perform full file system acquisition even for latest iPhone models with iOS 13 through jailbreaking. But there are some things you should know.

Jailbreaking is not completely safe. It may brick the device or put it into a boot loop, and it also makes multiple changes to the device file system, even with the rootless jailbreak.

Are there any disadvantages of agent-based extraction? Not a single one, at least for iOS 11.0 to 13.3. Except checkra1n (see below).

One more thing. With iOS 13, some files and folders have improved security attributes and are not accessible by tar over ssh. There is no such problem with agent-based acquisition.

We even made our method compatible with intermediate beta versions of iOS (in the 11-13.3 range) where jailbreaks do not work at all.

Advantages over checkm8 extraction

checkm8-based acquisition is pretty nice, but the devil is in the detail.

First, checkm8 is compatible with a limited number of devices and iOS versions: iPhone 5s to iPhone X, and iOS from 12.3. So forget about the iPhone Xr, Xs, 11 and 11 Pro (as well as many iPads); they are not vulnerable to this exploit. Also, despite the fact that the exploit is hardware-based, the checkra1n jailbreak (and all current checkm8-based acquisition processes) are NOT compatible with iOS 12.2 and below.

Second, the checkra1n jailbreak is not 100% reliable. There are so many compatible devices it does not work on, and the same about direct checkm8 implementation. If there is an error, you’re stuck with it; moreover, you can even ‘brick’ the device with it (it really happened to couple of our test devices). How about the speed? Amazingly low, thanks to ssh and some other things. Some extractions cannot complete in a week, we have no idea why.

The only two real advantages of checkra1n/checkm8 are: they do not require an Apple Developer account, and they allow BFU (Before First Unlock) extractions for devices with an unknown passcode. Also, checkra1n supports iOS 13.3.1 (the latest version at the time of writing this article, though 13.4 is expected very soon). You can use still checkra1n with our iOS Forensic Toolkit to get partial file system and keychain extraction of locked and even desiabled devices.

Usage & troubleshooting

Make sure you have read the iOS Forensic Toolkit manual first, as well as the following two articles:

We described all the steps at iPhone Acquisition Without a Jailbreak (iOS 11 and 12):

  • Put the device into airplane mode (this is mandatory!) and connect it to the computer with EIFT. Make sure that Wi-Fi and Bluetooth are disabled from iOS settings (and not from from the Control Centre)
  • Establish trust relationship (otherwise you will get the “ERROR: Could not connect to lockdownd, error code -2” message in the EIFT)
  • Install the extraction agent though EIFT. You will need to enter Apple ID and app-specific password of the developer’s account, followed by the TeamID; please note that signing the agent requires an internet connection on your computer (but NOT on the iOS device, which should remain offline at all times).
  • Once the agent is installed, it is recommended to disable all Internet connections on the computer you perform the acquisition on.
  • Tun the Agent on the device and leave it running in the foreground.
  • Acquire the keychain and capture the file system; during keychain acquisition, you will have to enter the passcode on the device (sometimes twice), or unlock using Touch ID or Face ID (for devices with Face ID, you will first receive the prompt whether you allow Agent to use it for keychain access)
  • Uninstall the agent.

If something goes wrong when you run the extraction agent on the device (e.g. “Can’t connect to device on specified port” message in EIFT), you may need to reboot the device; make sure to wait for at least one minute after rebooting before starting an agent.


Quick tip: if you do not want to enter Apple ID, password and Team ID when installing the Agent on every new device, you can set them up right in the EIFT script (Windows: Toolkit.cmd, lines 20-22; macOS: macosx/Toolkit.sh, lines 42-44):

AGENT_ID=john.doe@gmail.com
AGENT_PASSWORD=abcd-efgh-ijkl-mnop
AGENT_TEAMID=XXXXXXXXXX

Where AGENT_ID is the Apple ID enrolled into Apple Developer Program; AGENT_PASSWORD is app-specific password you should generate on your account, and AGENT_TEAMID is the Team ID (you can easily find it by logging in to Apple’s Developer Center, under Membership Information in Account | Membership).

Breaking VeraCrypt containers

$
0
0

VeraCrypt is a de-facto successor to TrueCrypt, one of the most popular cryptographic tools for full-disk encryption of internal and external storage devices. Compared to TrueCrypt, which it effectively replaced, VeraCrypt employs a newer and more secure format for encrypted containers, and significantly expands the number of supported encryption algorithms and hash functions. Learn how to break VeraCrypt containers with distributed password attacks.

VeraCrypt Encryption

Full-disk encryption tools rely on symmetric cryptography to encrypt data, and employ one-way transformations (hash functions) to protect the binary data encryption key with the user’s password. When attacking an encrypted container, the expert must either know the exact combination of the cipher and hash function, or try all of their possible combinations. If the expert makes the wrong choice of a hash function or cipher, the data will not be decrypted even if the correct password is known.

During the times TrueCrypt ruled the world of third-party full-disk encryption tools, users were presented with the choice of three individual encryption algorithms (AES, Serpent, and Twofish). In addition, five combinations of cascaded algorithms (AES-Twofish, AES-Twofish-Serpent, Serpent-AES, Serpent-Twofish-AES and Twofish-Serpent) were available, making the total of eight possible combinations. Passwords could be protected with one of the three supported hash functions (RIPEMD-160, SHA-512, or Whirlpool).

VeraCrypt offers the choice of some fifteen combinations of individual encryption algorithms and their cascaded combinations. Five different hash functions are supported, making it 15×5=75 possible combinations of symmetric ciphers and one-way hash functions to try. If you don’t know exactly which cipher and which hash function has been used to encrypt the container, you’ll have to try all of the 75 combinations during the attack.

VeraCrypt symmetric encryption algorithms

While Microsoft BitLocker and Apple FileVault 2 rely exclusively on AES encryption, it is common for third-party crypto containers to support more than one cipher. VeraCrypt in particular offers the choice of a number of symmetric encryption algorithms including AES, Serpent, Twofish, Camellia, and Kuznyechik. Additionally, ten different combinations of cascaded algorithms are available: AES–Twofish, AES–Twofish–Serpent, Camellia–Kuznyechik, Camellia–Serpent, Kuznyechik–AES, Kuznyechik–Serpent–Camellia, Kuznyechik–Twofish, Serpent–AES, Serpent–Twofish–AES, and Twofish–Serpent. Stacked encryption options are often considered the “safe side” of the matter.

In reality, neither the alternative ciphers nor stacked encryption offer tangible benefits over AES-256 encryption other than “not being the default”. If a container is encrypted with a cipher different from the default AES encryption, you’ll have to guess the correct encryption algorithm in addition to finding the password. Elcomsoft Distributed Password Recovery allows specifying the encryption algorithm(s) when setting up an attack.

VeraCrypt hash functions

When VeraCrypt encrypts or decrypts the data, it is using a perfectly random, high-entropy encryption key to perform symmetric cryptographic operations. This key is called a Media Encryption Key (MEK) or Data Encryption Key (DEK). The MEK is exactly the key one may be able to extract from the computer’s RAM dumps, hibernation and page files. If you are able to extract the MEK, you can fast forward to decrypting the data without running attacks on the user’s password. More about extracting media encryption keys and instantly decrypting VeraCrypt containers in our blog:

If the binary Media Encryption Key is not available, you’ll have to recover that key in order to decrypt the data. VeraCrypt stores the MEK alongside with the encrypted data. The Media Encryption Key is encrypted with a Key Encryption Key (KEK), which, in turn, is the result of multiple (hundreds of thousands) iterative one-way hashing operations performed on the user’s password. By default, VeraCrypt uses 500,000 rounds of hashing to ‘wrap’ the KEK. VeraCrypt supports four hash functions including SHA-512, Whirlpool, SHA-256 and Streebog.

In other words, when the user types their password, VeraCrypt performs 500,000 rounds of hashing with one of the four supported hash functions to calculate the KEK. The number of rounds is set to a deliberately high value in order to slow down brute-force attacks. A single Intel i7-9700K CPU delivers the following performance:

When running an attack on the user’s password, calculating the correct Key Encryption Key would not be possible without knowing which hash function exactly was used to produce the key. VeraCrypt offers the choice of SHA-512 (default), Whirlpool, SHA-256 and Streebog hash functions.

Using Elcomsoft Distributed Password Recovery to break VeraCrypt passwords

While VeraCrypt does protect its encrypted containers against brute-forcing the password, we have significant advances in password recovery attacks compared to what we had some ten years back. Brute-forcing a password today becomes significantly faster due to the use of GPU acceleration, distributed and cloud computing. Up to 10,000 computers and on-demand cloud instances can be used to attack a single password with Elcomsoft Distributed Password Recovery.

Brute force attacks became not just faster, but much smarter as well. The user’s existing passwords are an excellent starting point. These passwords can be pulled from the user’s Google Account, macOS, iOS or iCloud keychain, Microsoft Account, or simply extracted from the user’s computer. The user’s existing passwords give a hint at what character groups are likely used:

Elcomsoft Distributed Password Recovery offers a number of options to automatically try the most common variations of your password (such as the Password1, password1967 or pa$$w0rd):

Masks can be used to try passwords matching established common patterns:


Advanced techniques allow composing passwords with up to two dictionaries and scriptable rules:

If a non-standard hash function was selected, the attack will be slowed down significantly even with GPU acceleration. A single video card (e.g. NVIDIA GTX 1080) can process about 170 passwords per second with VeraCrypt default settings (AES encryption, SHA-512):

However, a non-standard combination of symmetric cipher and hash function (e.g. AES + Whirlpool, or Serpent + SHA-256) requires trying all possible combination of ciphers and hash functions. This will be significantly slower; about one password per second on the same computer equipped with a single video card:

Alternative attacks

Combining the use of multiple computers and cloud instances equipped with multiple GPU units may increase the recovery speeds significantly. Yet, even these higher speeds may not be enough when attacking containers protected with long, complex and non-reusable passwords. In such cases, alternative attacks may deliver better results.

The most commonly used alternative targets the on-the-fly encryption key (OTFE), or Media Encryption Key. This is the binary, symmetrical key VeraCrypt uses to encrypt and decrypt data it writes to or reads from the encrypted volume. Gaining access to the OTFE key allows decrypting the data directly without knowing or needing the password.

There is more than one way to access OTFE keys. While the encrypted volume is mounted, the encryption key is available in all of the following locations:

  1. The computer’s volatile memory (RAM). VeraCrypt needs the OTFE key in order to read and write data stored in the encrypted volume, so the encryption key is always stored in the RAM.
  2. Page file(s). While the OTFE key may or may not land in the page file, scanning the page file(s) takes minutes or several hours of time (compared to days and weeks of brute-forcing the password).
  3. Hibernation file. Windows uses a hibernation file to dump parts of the computer’s RAM onto the hard disk when the computer sleeps (if Hybrid sleep is enabled, which it is by default); when the computer hibernates (which is disabled by default); and when the computer shuts down (when Fast startup is enabled, which is enabled by default). The hibernation file can be only scanned if the boot volume is not encrypted or can be unlocked.

This is how the extraction works with Elcomsoft Forensic Disk Decryptor:

The time required to locate the OTFE keys depends largely on the amount of RAM installed in the user’s computer, and the speed of the expert’s PC. It also depends on the encryption settings. Selecting a non-standard combination of an encryption algorithm and hash function (e.g. AES+SHA-256 or AES+Whirlpool) will require trying all possible combinations instead of using the single default setting (AES+SHA-512), which takes extra time. In our experience, scanning a 16 GB memory dump can take 15 to 30 minutes with default settings and up to several hours with a non-standard combination of encryption and hash.

Tally ERP 9 Vault: How to Not Implement Password Protection

$
0
0

Tally ERP 9 is a “new-age business management software for new-age businesses” that is “tailor-made to delight”. With more than two million users, Tally is one of the most popular tools of its kind in India. The product includes the company’s implementation of secure storage named Tally Vault. How secure is Tally Vault, and what does one need to break in? In this article, we’ve provided some insights on how ElcomSoft researchers work when adding support for a new file format.

Support for Tally Vault is available since Elcomsoft Distributed Password Recovery 4.20.

Breaking Tally Vault

Tally Vault can be protected with a password. The password can be configured at the time one adds a new company; it is also possible to assign a password at a later time.

Once the password is set, ERP 9 creates a new protected vault. The old one (if any) can be deleted. If both encrypted and unencrypted versions of the company profile exist, one can select the right profile.


The new versions of Tally ERP 9 store the data in the following folder:

c:\Users\Public\Tally.ERP9\Data\(1nnnn)

If a password is specified for Tally Vault, the product encrypts all files with the .900 extensions that are over 512 bytes in size. However, the majority of the data is stored in a single file named Company.900. This file also stores information about the users if the “Use security control” option is enabled.

Unencrypted data is represented in the following way:

Once encrypted, the data looks as follows:

The file is comprised of 512-byte blocks. Each block starts with a 4-byte (32-bit) CRC checksum. When verifying the block, the tool calculates a CRC of the rest of the data (512 bytes less the 4-byte CRC) and compares the result with the checksum.

Now to the encryption. Tally uses an encryption algorithm derived from DES with a 64-bit encryption key. The DES algorithm used to be an industry standard originally introduced in 1977; in 2001, DES was superseded by AES, which is still used today. The 64-bit encryption key is derived straight from the user’s password (the concept of separate Media Encryption and Key Encryption keys is never heard of). Moreover, a slight modification of the user’s password leads to a similarly slight modification of the encryption key, which suggests a horribly weak implementation of key derivation. Considering that cryptographically strong hash functions (e.g. SHA-512) exist for a very long time, this result is truly amazing (as in “amazingly bad”). The encryption deals with 8-byte blocks.

Verifying the password is implemented by calculating the encryption key, decrypting the encrypted page and calculating the CRC of the decrypted data. The CRC is then compared with the check sum stored at the beginning of the page. Theoretically, decrypting the page and verifying the password would require decrypting some 64 blocks of 8 bytes each.

Reality is different. Each page includes a few bytes of fixed metadata. For example, immediately following the CRC there are four bytes containing the fixed value of 0x00000001. This is what’s considered a “known plain text”. As a result, the attacker does not have to decrypt the entire 512-byte page or calculate its checksum. Instead, decrypting the 4 bytes and comparing them with a known value of 0x00000001 is enough to try a password. Of course, collisions are unavoidable; for this reason, once the fixed four bytes are successfully decrypted, the attacker must verify the rest of the content by following the original algorithm (e.g. decrypting the entire page and calculating its CRC).

This value is not the only fixed metadata stored in encrypted pages. The offset 12 apparently stores the page number (unless it’s the last page), so even if Tally fixes this issue, other possibilities for fast attacks would remain.

So how does the speed of the known plaintext attack compare to the speed of the more straightforward attack that requires decrypting the whole page?

Whole page decryption, passwords per second Known plain text attack as used in EDPR, passwords per second
Intel Core i7 6700 170 000 5 400 000
Intel Core i7 9700K 345 000 11 400 000


Conclusion

The “tailor-made to delight” software for “new-age businesses” delivers the worst implementation of data protection we’ve seen in the last 20 years. It’s so bad we don’t know where to start from; there is no single aspect that’s done right. The encryption key is directly derived from the user’s password instead of using separate media encryption and key encryption keys. The homegrown algorithm deriving the encryption key from the user’s password is weak beyond imaginable; we couldn’t write as bad a hash function even if we tried. The DES-like encryption algorithm is outdated, while the 64-bit encryption key is way too short considering the outdated encryption algorithm. The known plain text metadata embedded in every encrypted page is icing on the cake. We just hope that new-age businesses will remain delighted if their encrypted data falls into the wrong hands.

Using Microsoft Azure to Break Passwords

$
0
0

Modern applications use highly secure and thus deliberately slow algorithms for verifying passwords. For this reason, the password recovery process may take a lot of time and require extreme computational resources. You can build your own powerful cluster to accelerate brute-force attacks, but if you only need to recover a password every once in a while, maintaining your own cluster may not be the best investment. Cloud services can help do a one-off job faster. For a long time, Elcomsoft Distributed Password Recovery had supported Amazon cloud services with automatic deployment on Amazon’s powerful GPU-accelerated servers. The latest update brings support for Microsoft Azure, adding the ability to automatically deploy Password Recovery Agents to virtual machines created in Microsoft Azure. In this article I will describe the deployment steps.

First log in to your Azure account and launch Azure Portal. All virtual machines with agents must be included in one resource group. Please note that agents will be installed to each machine in that particular resource group. If you don’t have an empty resource group, you’ll have to create it:

Please ensure that the desired virtual machine sizes are present in the selected region. Virtual machines with GPU acceleration are optimal for the password recovery. The most powerful machines equipped with Tesla V100 GPU are in the Azure NCv3-series. You can also use any other GPU powered series such as the NC, NV, NVv3 and so on. These virtual machines can be used on-demand, meaning you won’t pay for them while they are stopped (except a small storage fee). For the purpose of password recovery, all machines must run Windows OS. We recommend using Windows Server 2012 as the most affordable solution. All virtual machines must be in the same region as the created storage group.

Your virtual machine should look like this:

We recommend to select “Standard HDD” storage because storage type does not affect the performance of brute-force attacks. At the same time, HDD-based storage is  considerably less expensive compared to SSD-based one.

All virtual machines must be in the “Running” state before installing the agents:

The next step is installing Elcomsoft Distributed Password Recovery with the “Agent Azure deployment” option:

Run EDPR Console (Distributed Password Recovery) and select “Azure -> Install agents on virtual machines” from the menu. Windows PowerShell will come up with Azure Sign In window:

Enter your Azure login and password (if you have 2FA on your account, you will need to pass it). The next step is specifying the IP address and port number for your EDPR server. If you have a EDPR server on your computer, please ensure that the EDPR agent port (usually 12121) is properly mapped on your router. If you have your EDPR server in Microsoft Azure, you can enter the internal IP address of the virtual machine with installed server.

Select your Azure subscription (this dialog will not appear if you have only one subscription):

Select the resource group that contains your virtual machines:

The script will show you all the virtual machines that you created in resource group. All machines must be in the “Running” state:

Press Enter, and the agent deployment process will start!

NVIDIA drivers will be installed on GPU accelerated machines:

Please be patient. Installing the drivers and the agent may take some time (approximately 3-10 minutes for each machine). And finally you will see all the virtual machines in the EDPR console:

Run any password recovery task and enjoy Azure GPU acceleration!

The latest version of Elcomsoft Distributed Password Recovery can be downloaded here.

Breaking LastPass: Instant Unlock of the Password Vault

$
0
0

Password managers such as LastPass are designed from the ground up to withstand brute-force attacks on the password database. Using encryption and thousands of hash iterations, the protection is made to slow down access to the encrypted vault that contains all of the user’s stored passwords. In this article, we’ll demonstrate how to unlock LastPass password vault instantly without running a length attack.

LastPass

Introduced by Marvasol Inc (acquired by LogMeIn) in 2008, LastPass is one of the four most popular password managers. Similar to other password managers, LastPass is designed to store, manage and synchronize passwords, which supposedly helps using complex, unique and non-reusable passwords for the many online accounts without having to memorize all of them.

LastPass offers desktop apps for Windows and macOS, as well as mobile apps for iOS and Android. More interestingly, LastPass can be installed on multiple platforms as a cross-platform browser extension in many popular browsers.

LastPass collects and stores user’s passwords in a local database. The database can be encrypted with a master password. Due to the sensitive nature of the information stored in the password vault, LastPass applies strong encryption and uses multiple rounds of hashing to slow down potential brute-force attacks. Similar to other password managers, LastPass may use different protection settings to protect password vaults on different platforms, desktop apps carrying the strongest protection and Android app using the weakest protection.

Technically speaking, LastPass keeps all passwords along with other authentication credentials in a SQLite database. The database is secured with a password, which, in turn, is used to generate the encryption key after going through some 5,000 to about 100,000 rounds of hashing depending on the platform.

For security reasons, desktop platforms offer the best protection. The LastPass database we obtained from a Windows computer was protected with 100,100 hash iterations. Attacking the database directly would result in the following speeds:

The attack speed of 15,500 passwords per second using a GeForce 2070 GPU is about average, offering reasonable protection of the password database if the user sets a long, complex master password that is not based on combinations of dictionary words.

Since most customers use their mobile devices to access accounts and open documents, LastPass also offers mobile apps on both iOS and Android platforms. The common property of these platforms is the touch screen. Unlike physical keyboards, touch screens don’t have the “motor learning” property; as such, they aren’t the best when it comes to entering long and complex passwords. This results in simpler master passwords selected by users who frequently unlock their protected vaults on mobile devices. While Touch ID or Face ID do help avoid typing in the master password, but authentication with a master password is still required from time to time.

LastPass password databases can be also acquired from Android and iOS devices (file system level access required with unc0ver or rootless extraction). On Android, LastPass uses weaker protection with only 5000 rounds of hashing. Correspondingly, the attack speeds are significantly higher compared to the Windows version – yet obtaining root access or imaging the file system of an Android device may be difficult or impossible.

The brute-force speed of LastPass password databases obtained from Android devices can reach some 309,000 passwords per second if one uses a single NVIDIA GeForce 2070 GPU. We consider this speed relatively high. The attack of 309,000 passwords per second allows recovering complex master passwords in reasonable time. For example, a 7-character password containing some digits, small and capital letters but no special characters (typical for mobile devices) can be recovered in less than three months, while breaking a shorter 6-character password with the same properties can take less than 3 days.

There is, however, one special case where no brute force is required to unlock the protected vault.

The Chrome Extension

LastPass can be installed as an extension in Google Chrome and the new Chromium-based Microsoft Edge browsers.

The browser extension offers what’s arguably the most convenient way to automatically fill passwords on Web pages. Since most passwords protect online resources, many users skip the desktop app and use the Chrome extension exclusively.

LastPass advertises the same level of security for protecting the user’s password database in the Chrome extension:

Only you know your master password, and only you can access your vault. Your master password is never shared with LastPass. That’s why millions of people and businesses trust LastPass to keep their information safe. We protect your data at every step.

Source

We discovered that’s not always the case. In fact, it’s almost never the case. If the user installs the Chrome extension and protects the password vault with their master password, the extension may cache the user’s master password in the main database if the user selects the “Remember password” check box.

Why use the “Remember password” option? Similar to other password managers, LastPass would otherwise require the user to authenticate each session by typing in their vault password (which, by design, is supposed to be a very long and complex one). Storing the vault password in the vault itself is a natural way to spare the typing. However, it appears that LastPass does not adequately protect the master key if the “Remember password” option is selected:

“The vulnerability (referred to asLastPass-Vul-1) lies in the insecure design of the master password remembering mechanism in LastPass. As shown in Figure 2, LastPass can even remember a user’s master password (with the BCPM username) into a local SQLite [40] database tableLastPassSavedLogins2, allowing the user to be automatically authenticated whenever LastPass is used again.”

Source

This vulnerability is still present in all recent versions of the LastPass Chrome extension (we’ve used LastPass 4.44.0 in Google Chrome 80.0.3987.146 running in Windows 10 x64). As a result, the forensic expert may be able to extract and decrypt the password vault instantly without brute-forcing the master passwords on one condition: the user had selected the “Remember password” check box.

Windows Data Protection API Not Used

One may argue that extracting passwords stored by the Google Chrome browser is similarly a one-click affair with third-party tools (e.g. Elcomsoft Internet Password Breaker). The difference between Chrome and LastPass password storage is that Chrome makes use of Microsoft’s Data Protection API, while LastPass does not.

Google Chrome does, indeed, store user’s passwords. Similar to third-party password managers, the Windows edition of the Chrome browser encrypts passwords when stored. By default, the encrypted database is not protected with a master password; instead, Chrome employs the Data Protection API (DPAPI) introduced way back in Windows 2000. DPAPI uses AES-256 to encrypt the password data. In order to access passwords, one must sign in with the user’s Windows credentials (authenticating with a login and password, PIN code, or Windows Hello). As a result, Google Chrome password storage has the same level of protection as the user’s Windows login.

This, effectively, enables someone who knows the user’s login and password or hijacks the current session to access the stored passwords. This is exactly what we implemented in Elcomsoft Internet Password Breaker.

However, in order to extract passwords from Web browsers such as Chrome or Microsoft Edge, one must possess the user’s Windows login and password or hijack an authenticated session. Analyzing a ‘cold’ disk image without knowing the user’s password will not provide access to Chrome or Edge cached passwords.

This is not the case for the LastPass Chrome extension (the desktop app is seemingly not affected). For the LastPass database, the attacker will not need the user’s Windows login credentials of macOS account password. All that’s actually required is the file containing the encrypted password database, which can be easily obtained from the forensic disk image. Neither Windows credentials nor master password are required.

macOS has a built-in secure storage, the so-called keychain. The Mac version of Chrome does not use the native keychain to store the user’s passwords; neither does the iOS version. However, Chrome does store the master password in the corresponding macOS or iOS keychain, effectively providing the same level of protection as the system keychain. Elcomsoft Password Digger can decrypt the macOS keychain provided that the user’s logon credentials (or the separate keychain password) are known.

Extracting LastPass Master Password

In order to extract the user’s master password protecting the LastPass password database, we’ll use Elcomsoft Distributed Password Recovery.

  1. LastPass Chrome extension stores the protected vault at the following path (Windows 10):
    Windows: %UserProfile%\AppData\Local\Google\Chrome\User Data\Default\databases\chrome-extension_hdokiejnpimakedhajhdlcegeplioahd_0
  2. Launch Elcomsoft Hash Extractor (part of Elcomsoft Distributed Password Recovery) and open the file referenced above. Important: you may either access files of the currently logged in user or extract information from the disk image.
  3. The tool will automatically extract the hash file. Save the *.esprlp2 (multiple accounts) or *.esprlp (single account) hash file and open that file in Elcomsoft Distributed Password Recovery. Note: instant recovery is only available if the master password was saved.
  4. Select an account to extract the password from.
  5. Run the attack.
  6. Elcomsoft Distributed Password Recovery will find and display the master password in a matter of seconds regardless of how long and complex the master password is.

Viewing all 195 articles
Browse latest View live